My rabbit hole since about mid-2020 has been making paint. My Kingdom Arts and Sciences entry involved a palette I’d made, and most of the scrolls I’ve made in the last six months or so have used paint I’ve made. A lot of people have been asking for when I’m teaching classes on that, but as I’m currently having issues with technology, y’all are just going to have to settle for a blog post.
To start, you’ll need the following supplies. I will be giving plenty of alternates, because I understand how much getting started on something without necessarily having a full budget is, but also, as much as I love doing things in the SCA, in this economy, I want to make sure that you can do this on a budget. I’ll be going layer by layer, then process step by step.
Things you will need:

Non-slip mat or a towel. I use nonslip shelf liner, but a damp towel can also work. The towel is more period, but for things that are cheap, the nonslip shelf liner can be purchased at a dollar store for about a $1.25 USD. The reason for this is that the slab that you use can and will move around as you make paint, and to avoid that, use something like those things to keep it from moving around. It also can help cushion the slab.
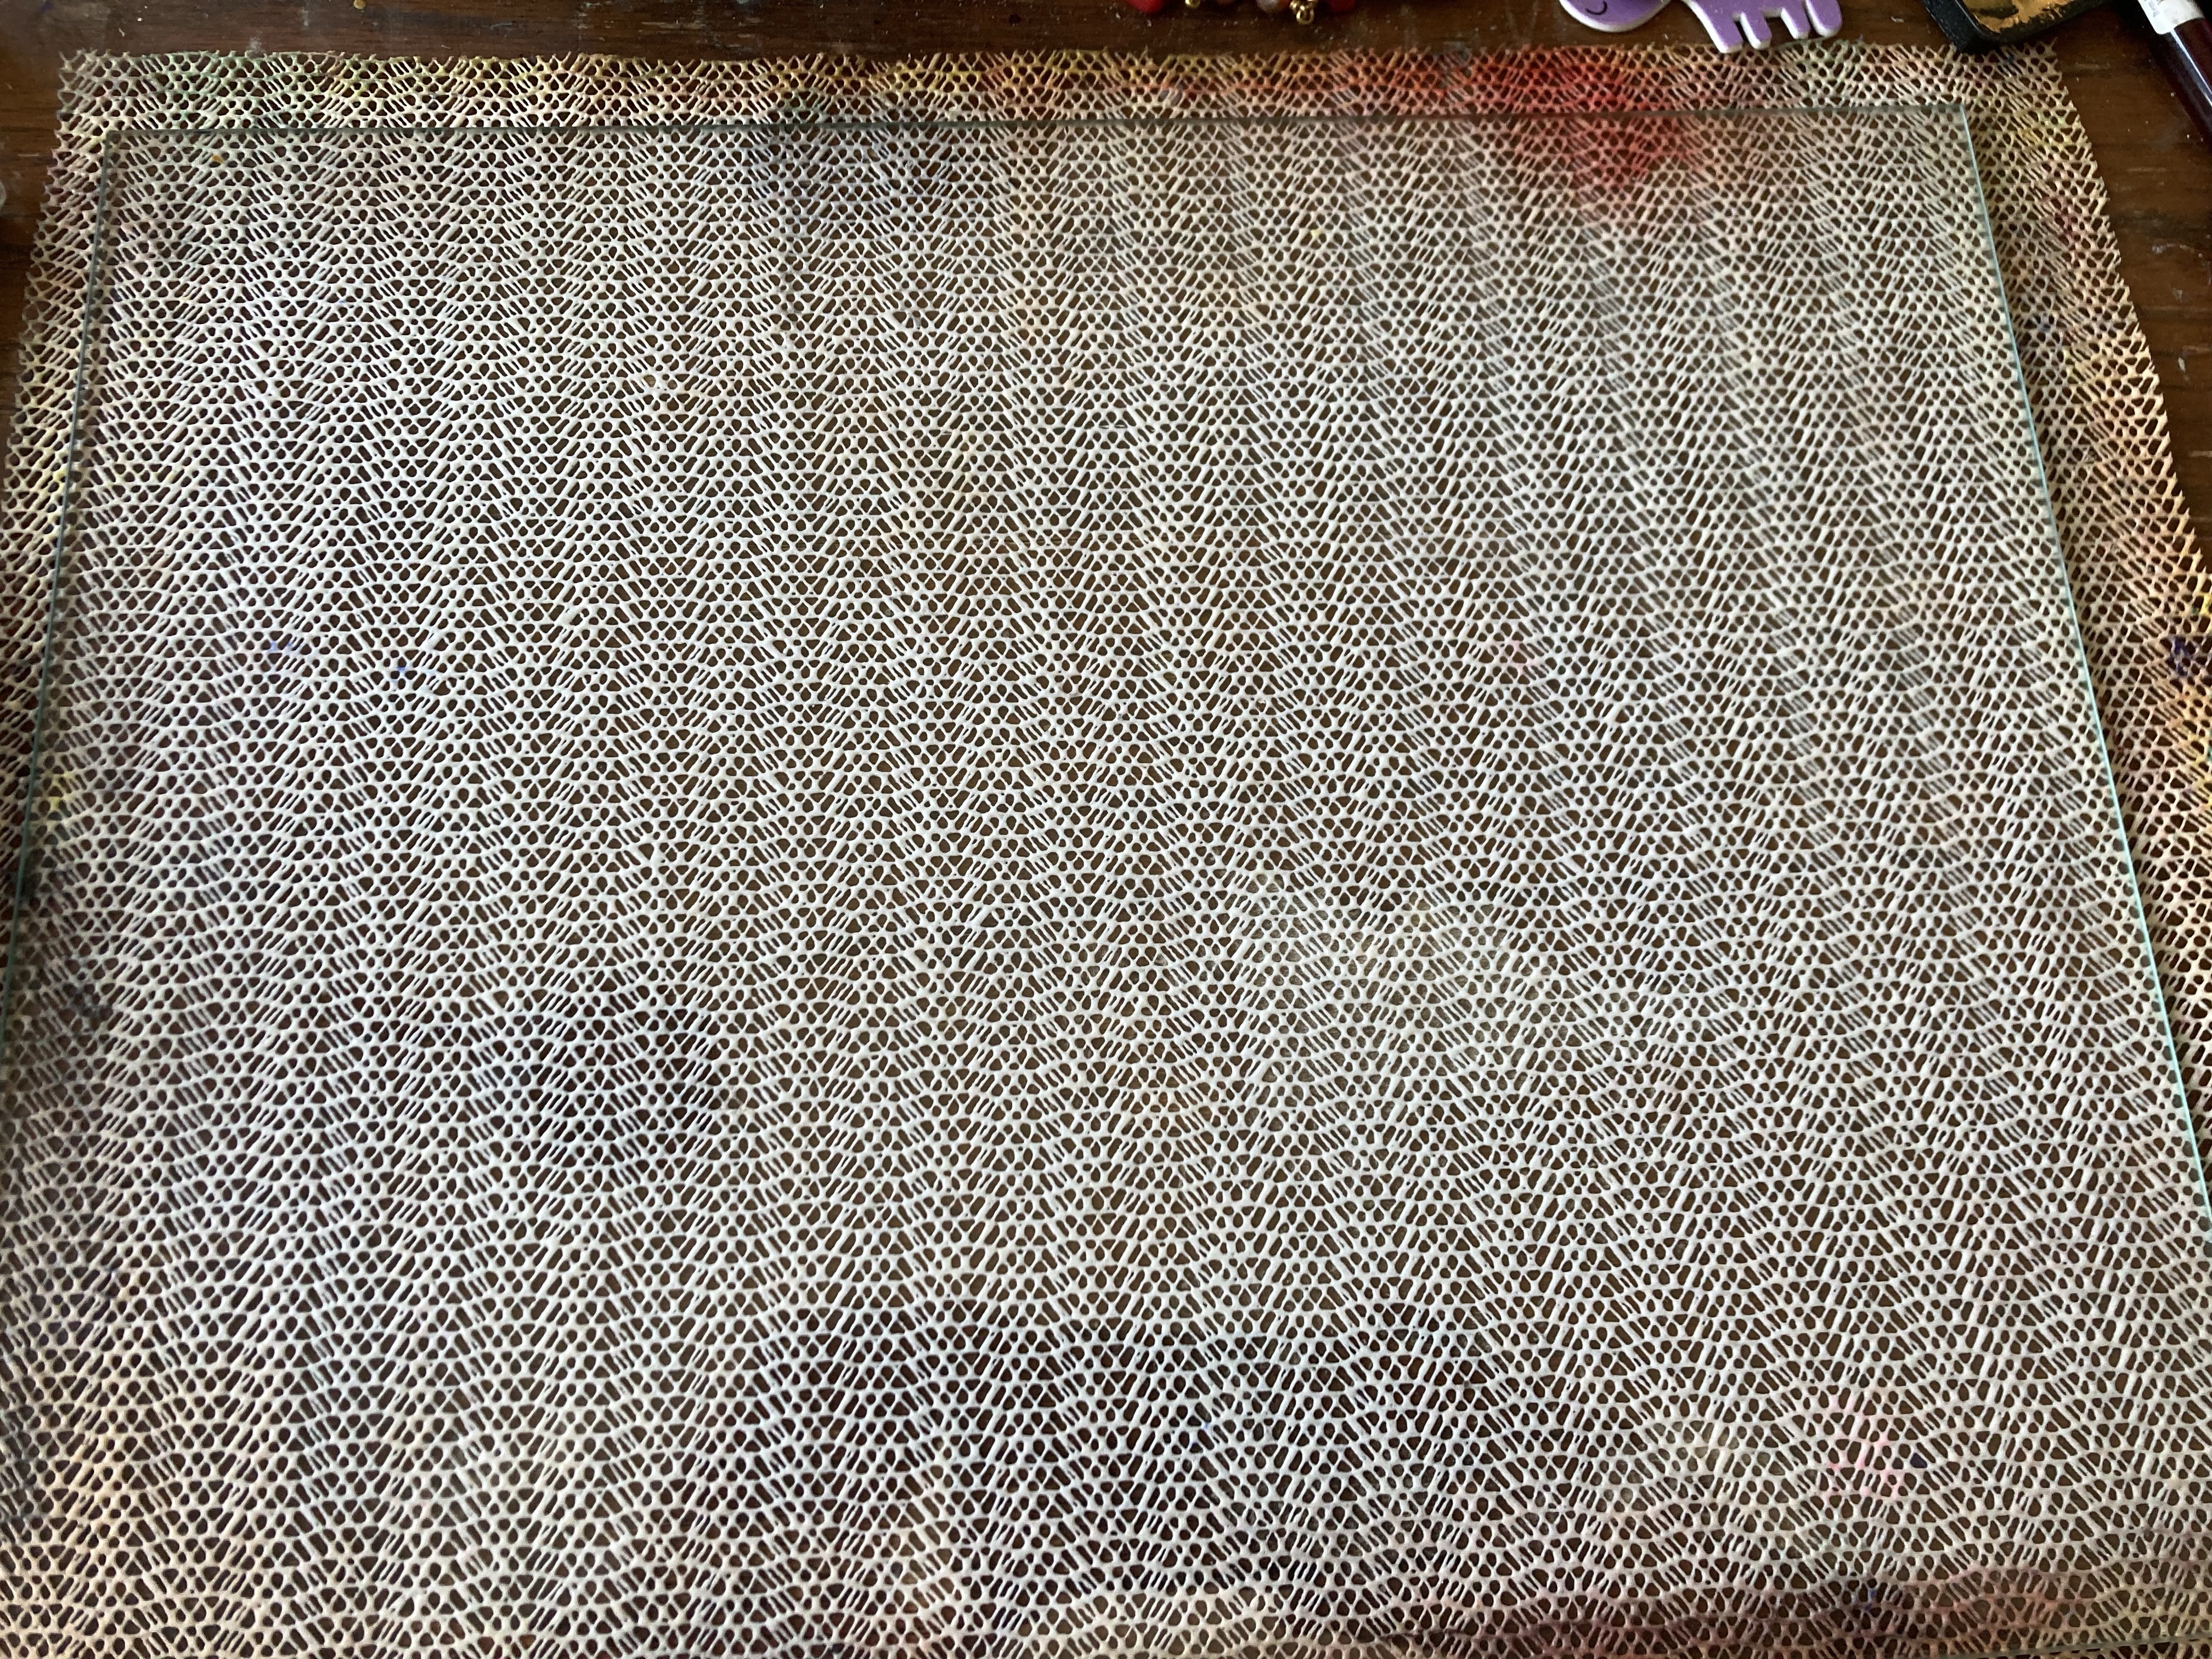
Glass plate, piece of glazed tile, or an old marble cutting board. I use a glass palette, roughed up with a bit of sandpaper to make sure that the pigment particles suspend in the binder. You can absolutely use a piece of tile (my very first time making a tiny bit of paint was using glazed ceramic tile), or a marble cutting board (which is similar to the porphyry slab Cennini cites to use when mixing paint). The key is to make sure there are no big gouges in the slab, especially if you purchase the cutting board second hand, and that the only purpose for this slab is making paint.
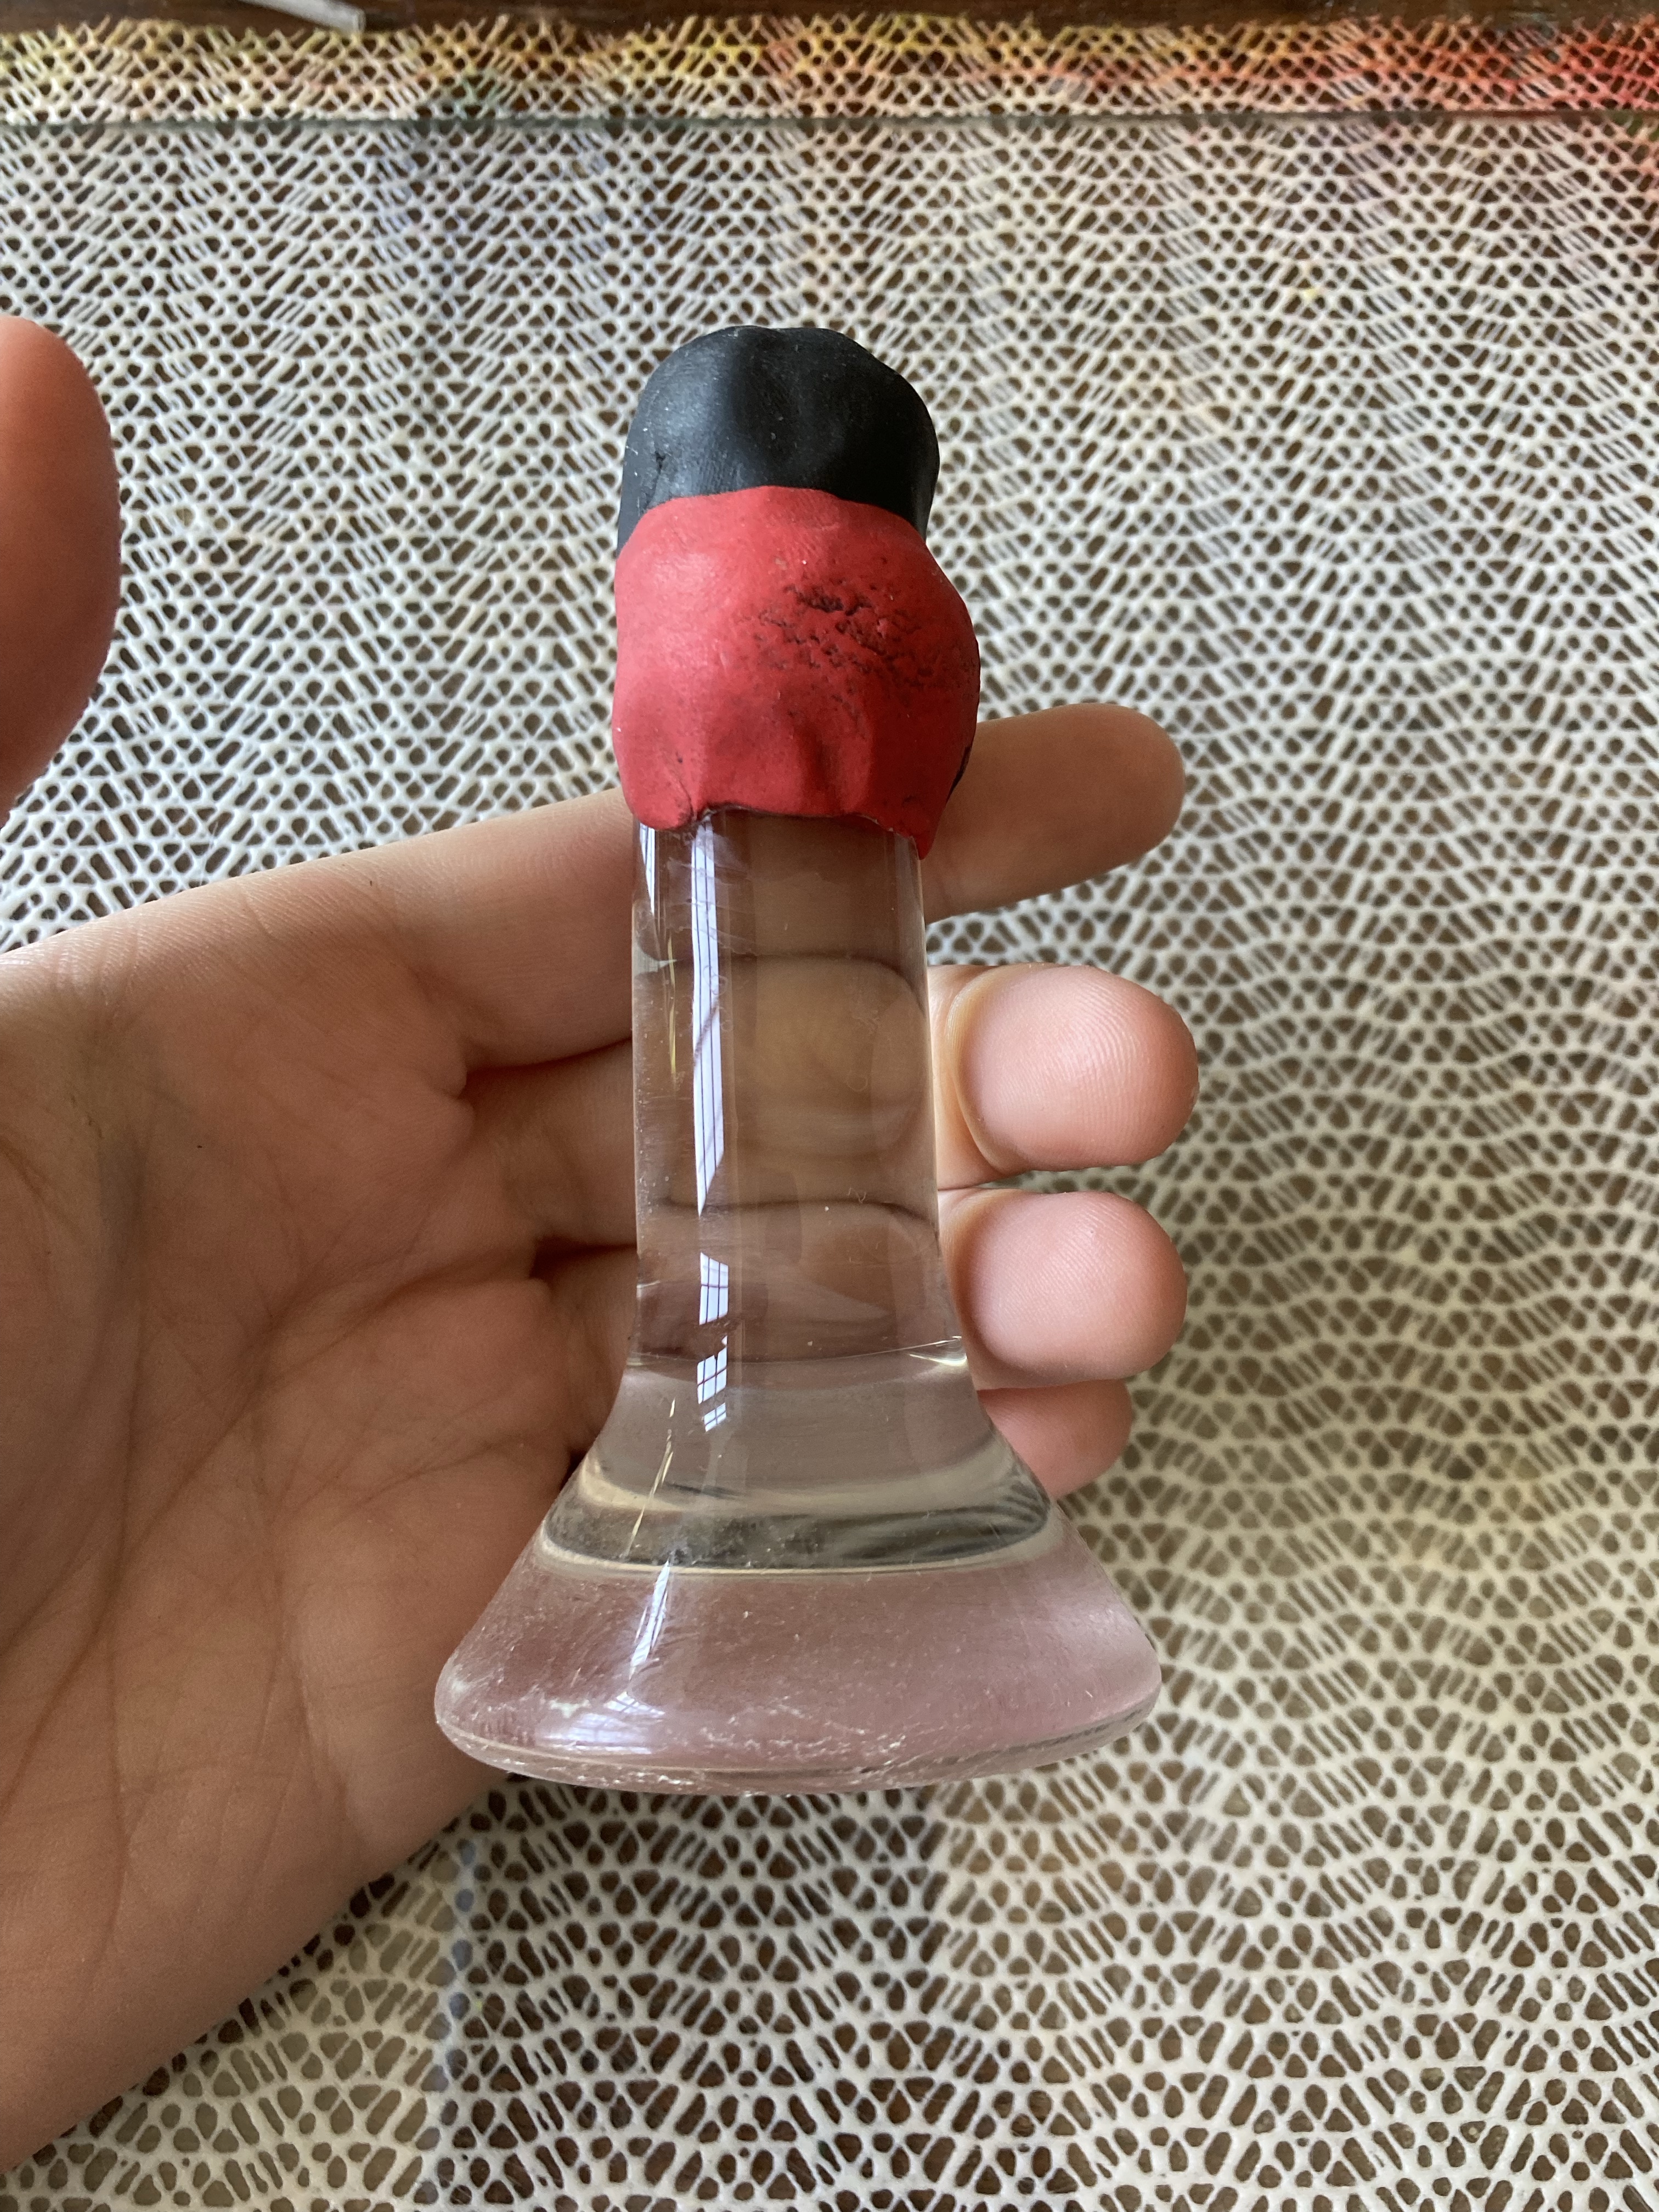
A muller or a flat-bottomed piece of frosted glass. This is the implement that will be used to mix your paint with the binder. The muller I have was a gift, but came from this store on Amazon and I have been really pleased with it, but before that, I used a piece of a desk trophy that my friend Alan cut and frosted for me. Glass fermentation weights or secondhand goblet with a completely flat bottom can also work, but the glass will need to be roughed up (silicon carbide or sandpaper will do the trick!) so that the pigment can be evenly distributed. The nice thing about the traditional style muller is that if you need to cushion it with a bit of Sugru, you can – mine was cushioned this way to help me grip the handle.
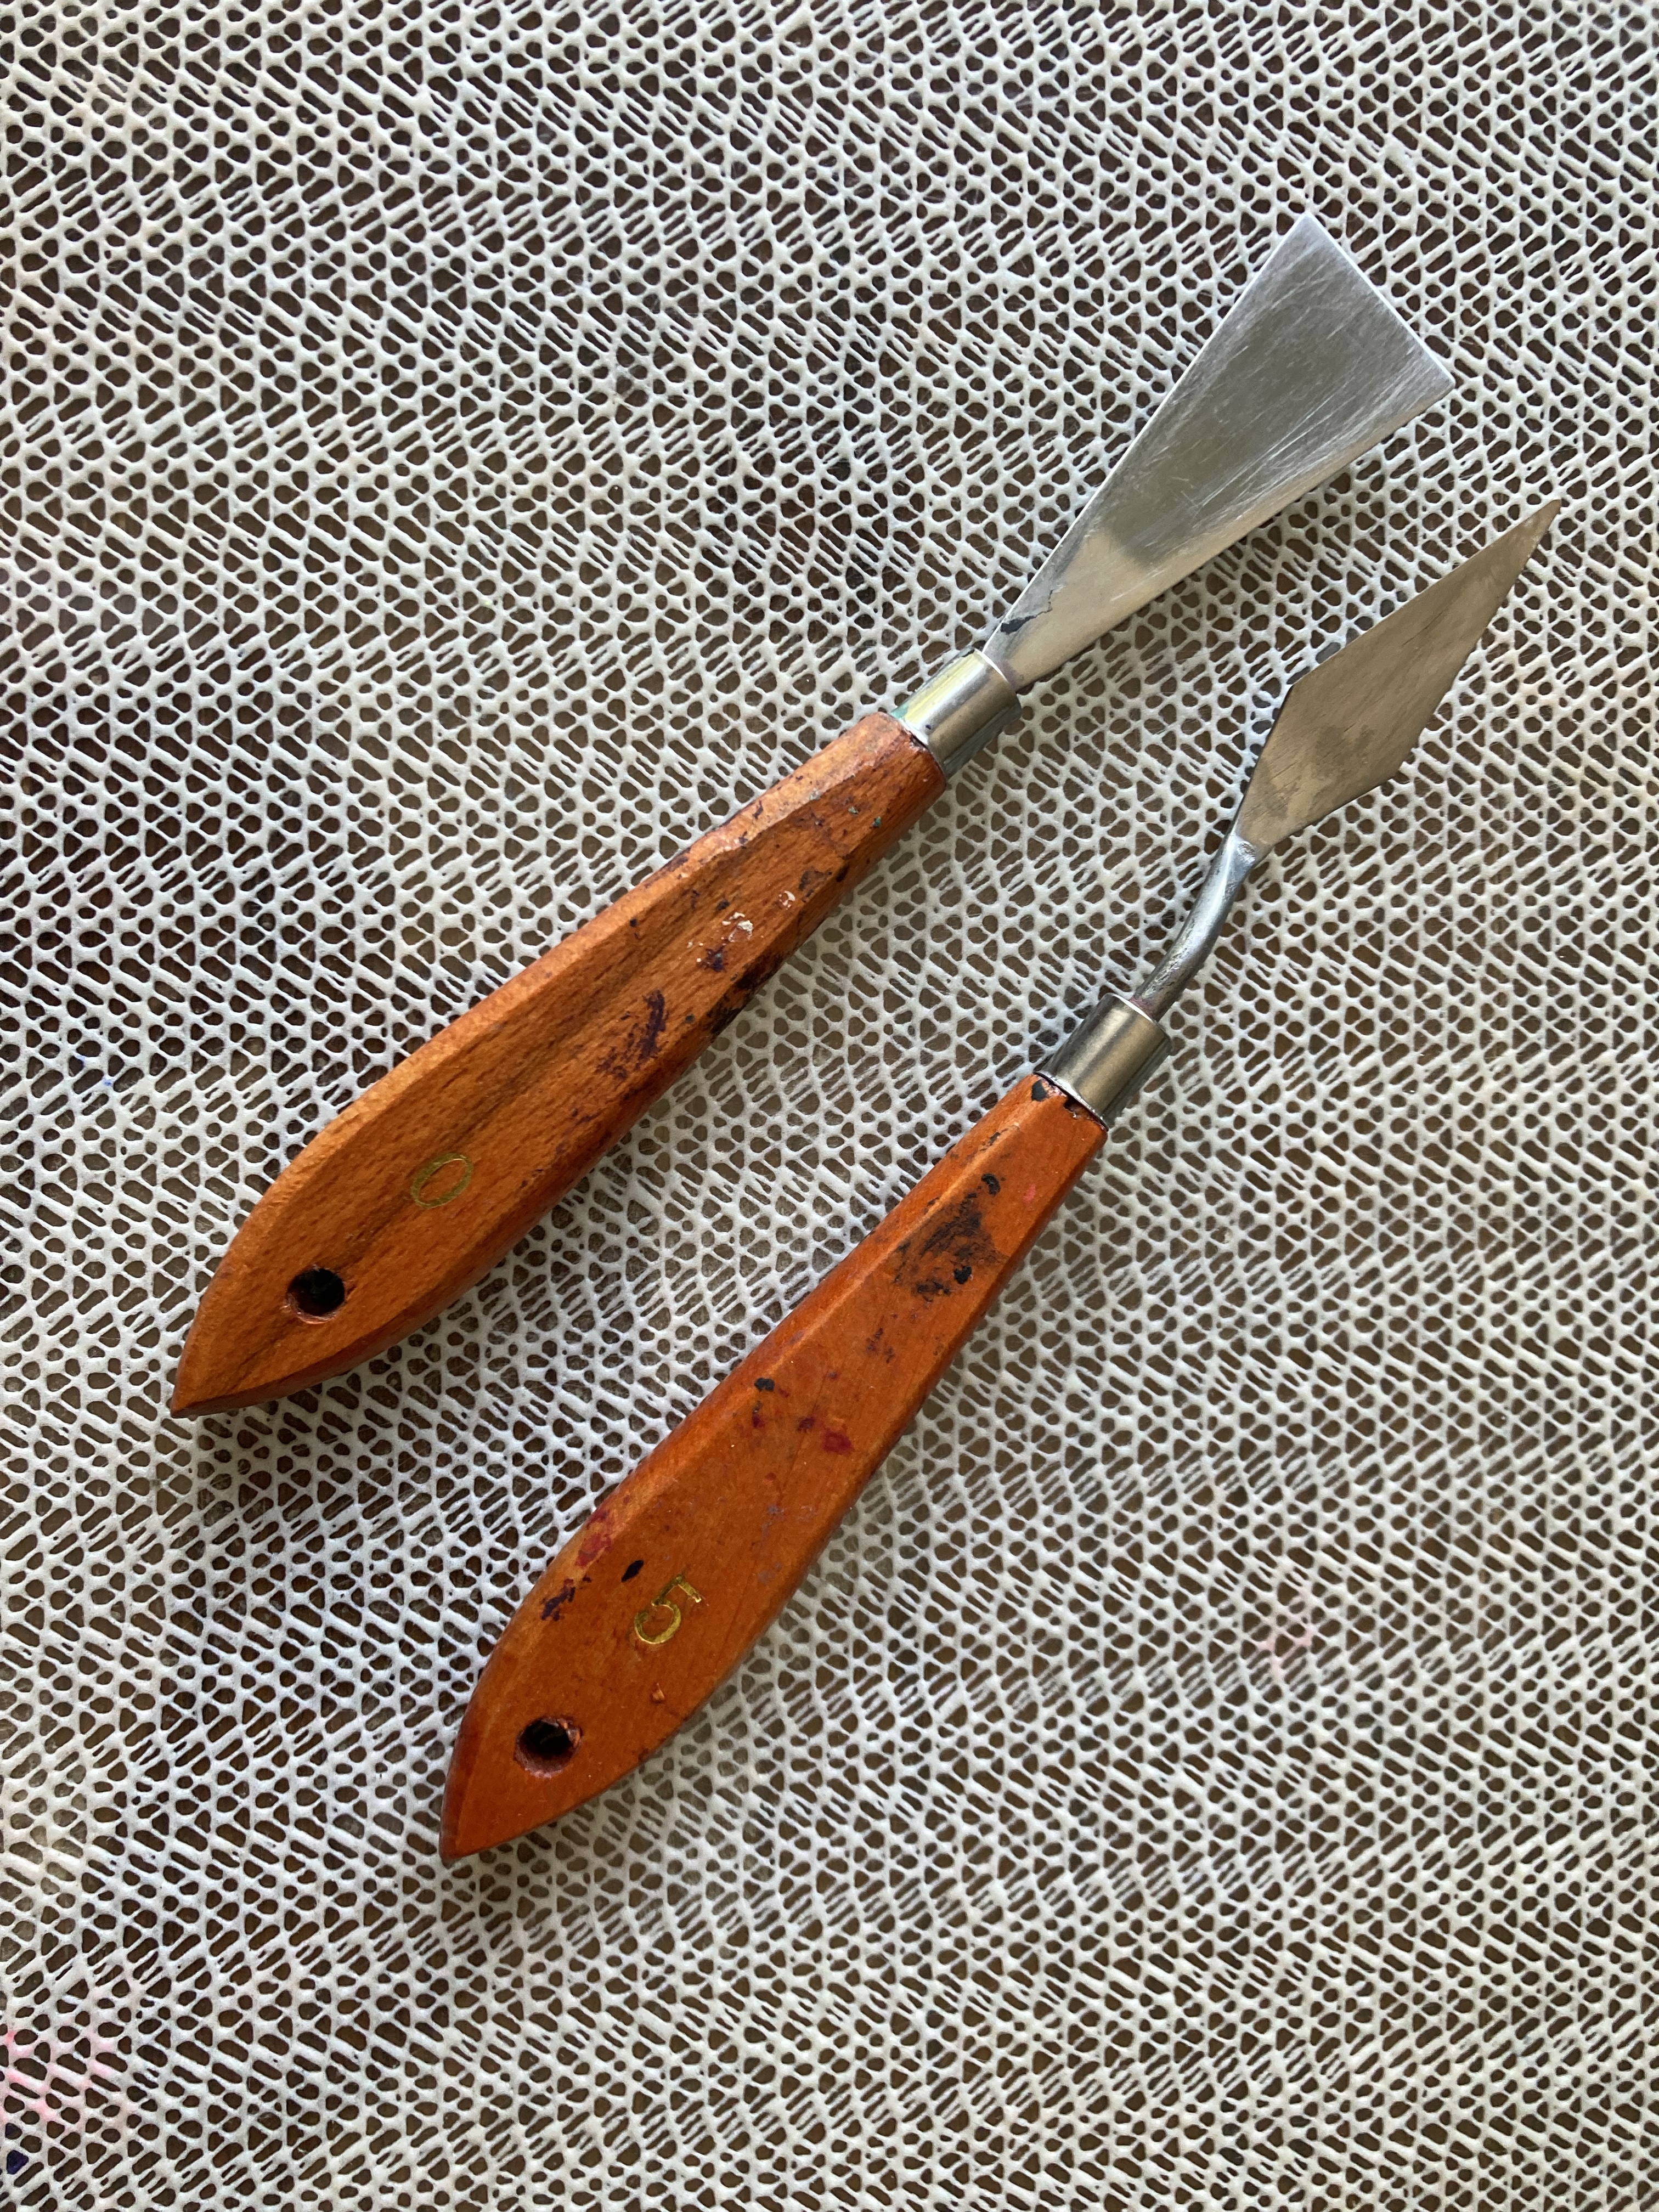
Palette knives. I got mine out of a pack of three, but most of the time, I only use these two, and yes, plastic palette knives can work if you’re starting out. You’ll need them to help gather up paint, mix pigment in with the binder, scrape the muller down, and push paint back into the middle of the slab. These are absolutely necessary. I generally stick to these two shapes, but if you have a fairly flexible knife to mix and a fairly stiff one to help scrape, you’re pretty well golden. I have heard of some folks using cake spatulas to mix paint and a small bench scraper to get paint, and I can see it work (albeit messily), but my biggest caution is to not use that spatula for food ever past mixing paint up.
Pipettes. So, I’m a huge proponent of pipettes when adding binder to pigment or adding water to finished paints because it’s easier to control exactly how much you’re adding. I use cheap plastic one-piece pipettes for this purpose, because even though they are reusable, even if they get gunky and gross, I can throw them out and not feel too bad about the cost to me. They are also cost effective at $3.42 for package of twelve.
Spray bottle. I recycled an old spray bottle, and refill it with tap water. I use this to help clean up after I’ve made paint by spraying down the slab and using a paper towel to clean up the leftovers. Beats running to the sink after every batch of paint.
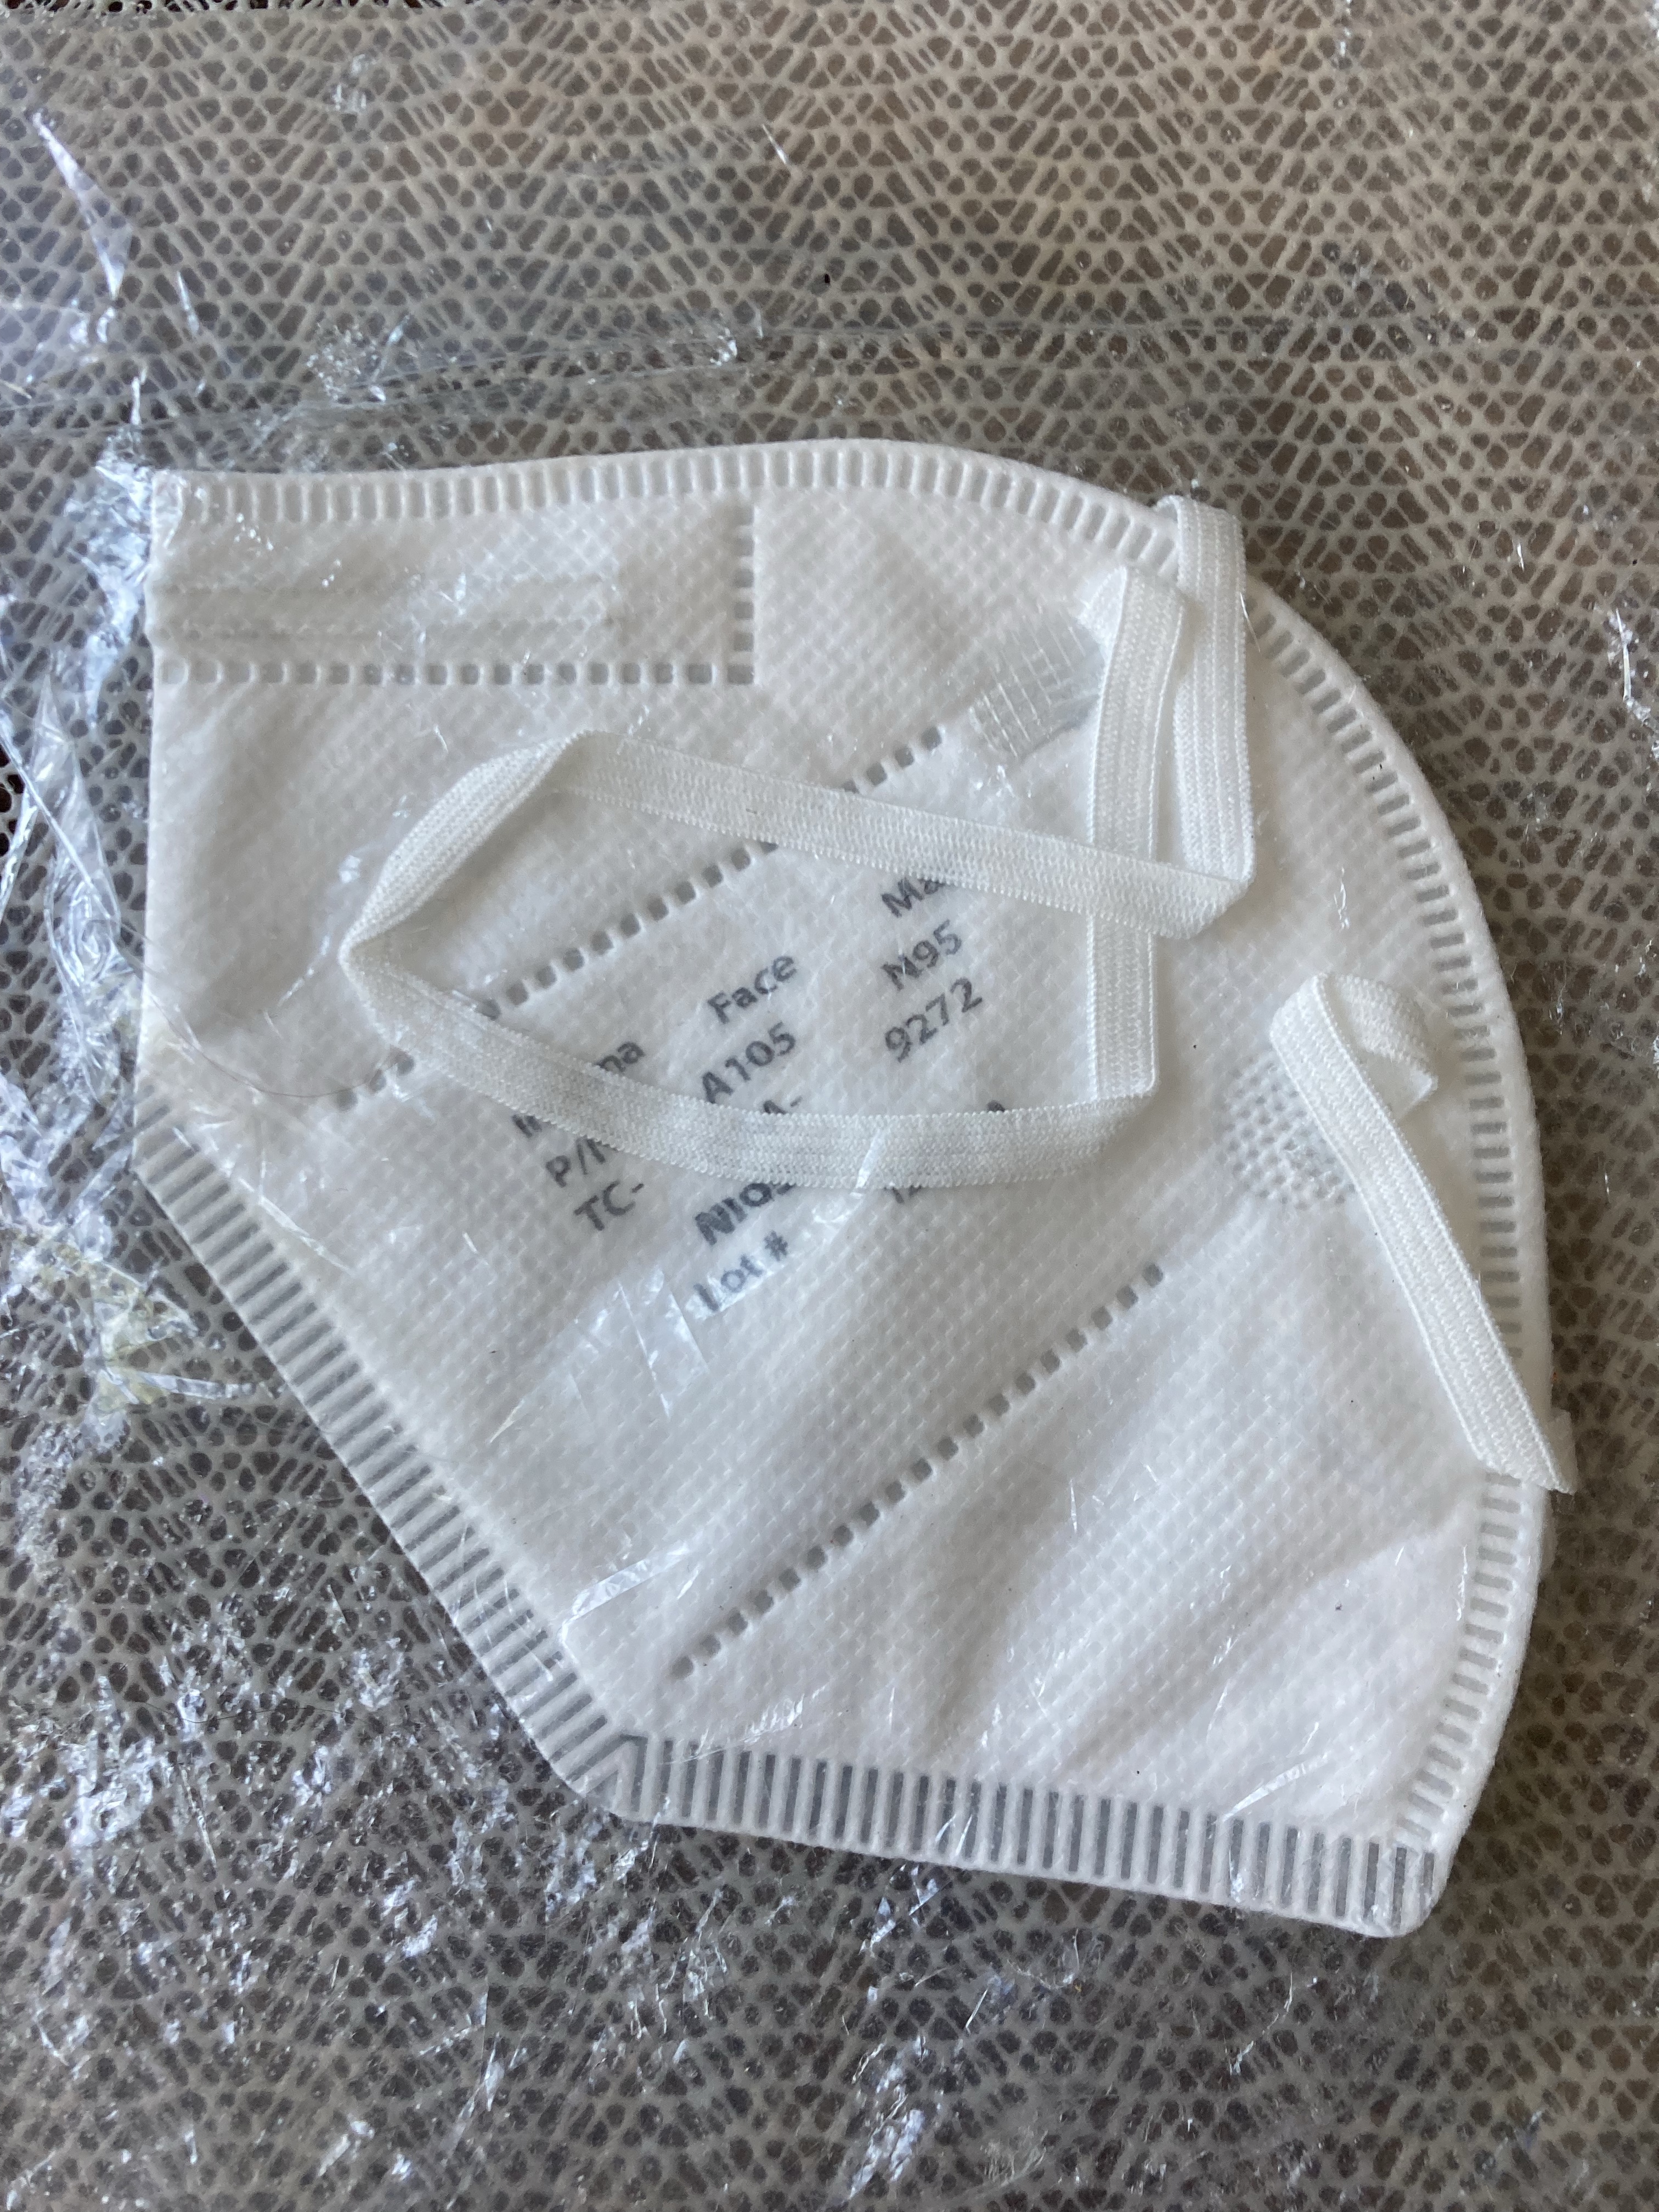
Safety equipment. This one is incredibly important. While a lot of modern pigments are certified non-toxic, but this is only if you try to eat them. Even if you have a very still room with good ventilation, it’s generally a good idea to make sure that you are using a N95 mask at minimum to reduce the chances of getting particulates in places where they need not to go. That said, if you are working with more toxic pigments, please exercise extreme caution: copper poisoning can result in liver damage, and lead poisoning is cumulative and can lead to anemia and other issues – and that’s on the low end of possibilities. I wear nitrile gloves that I swap out every time I make a new colour, and I always wear a mask when I paint so that I don’t end up with particulates in my lungs. The upsides of wearing gloves also helps with cleanup (especially if you do the surgical removal process).
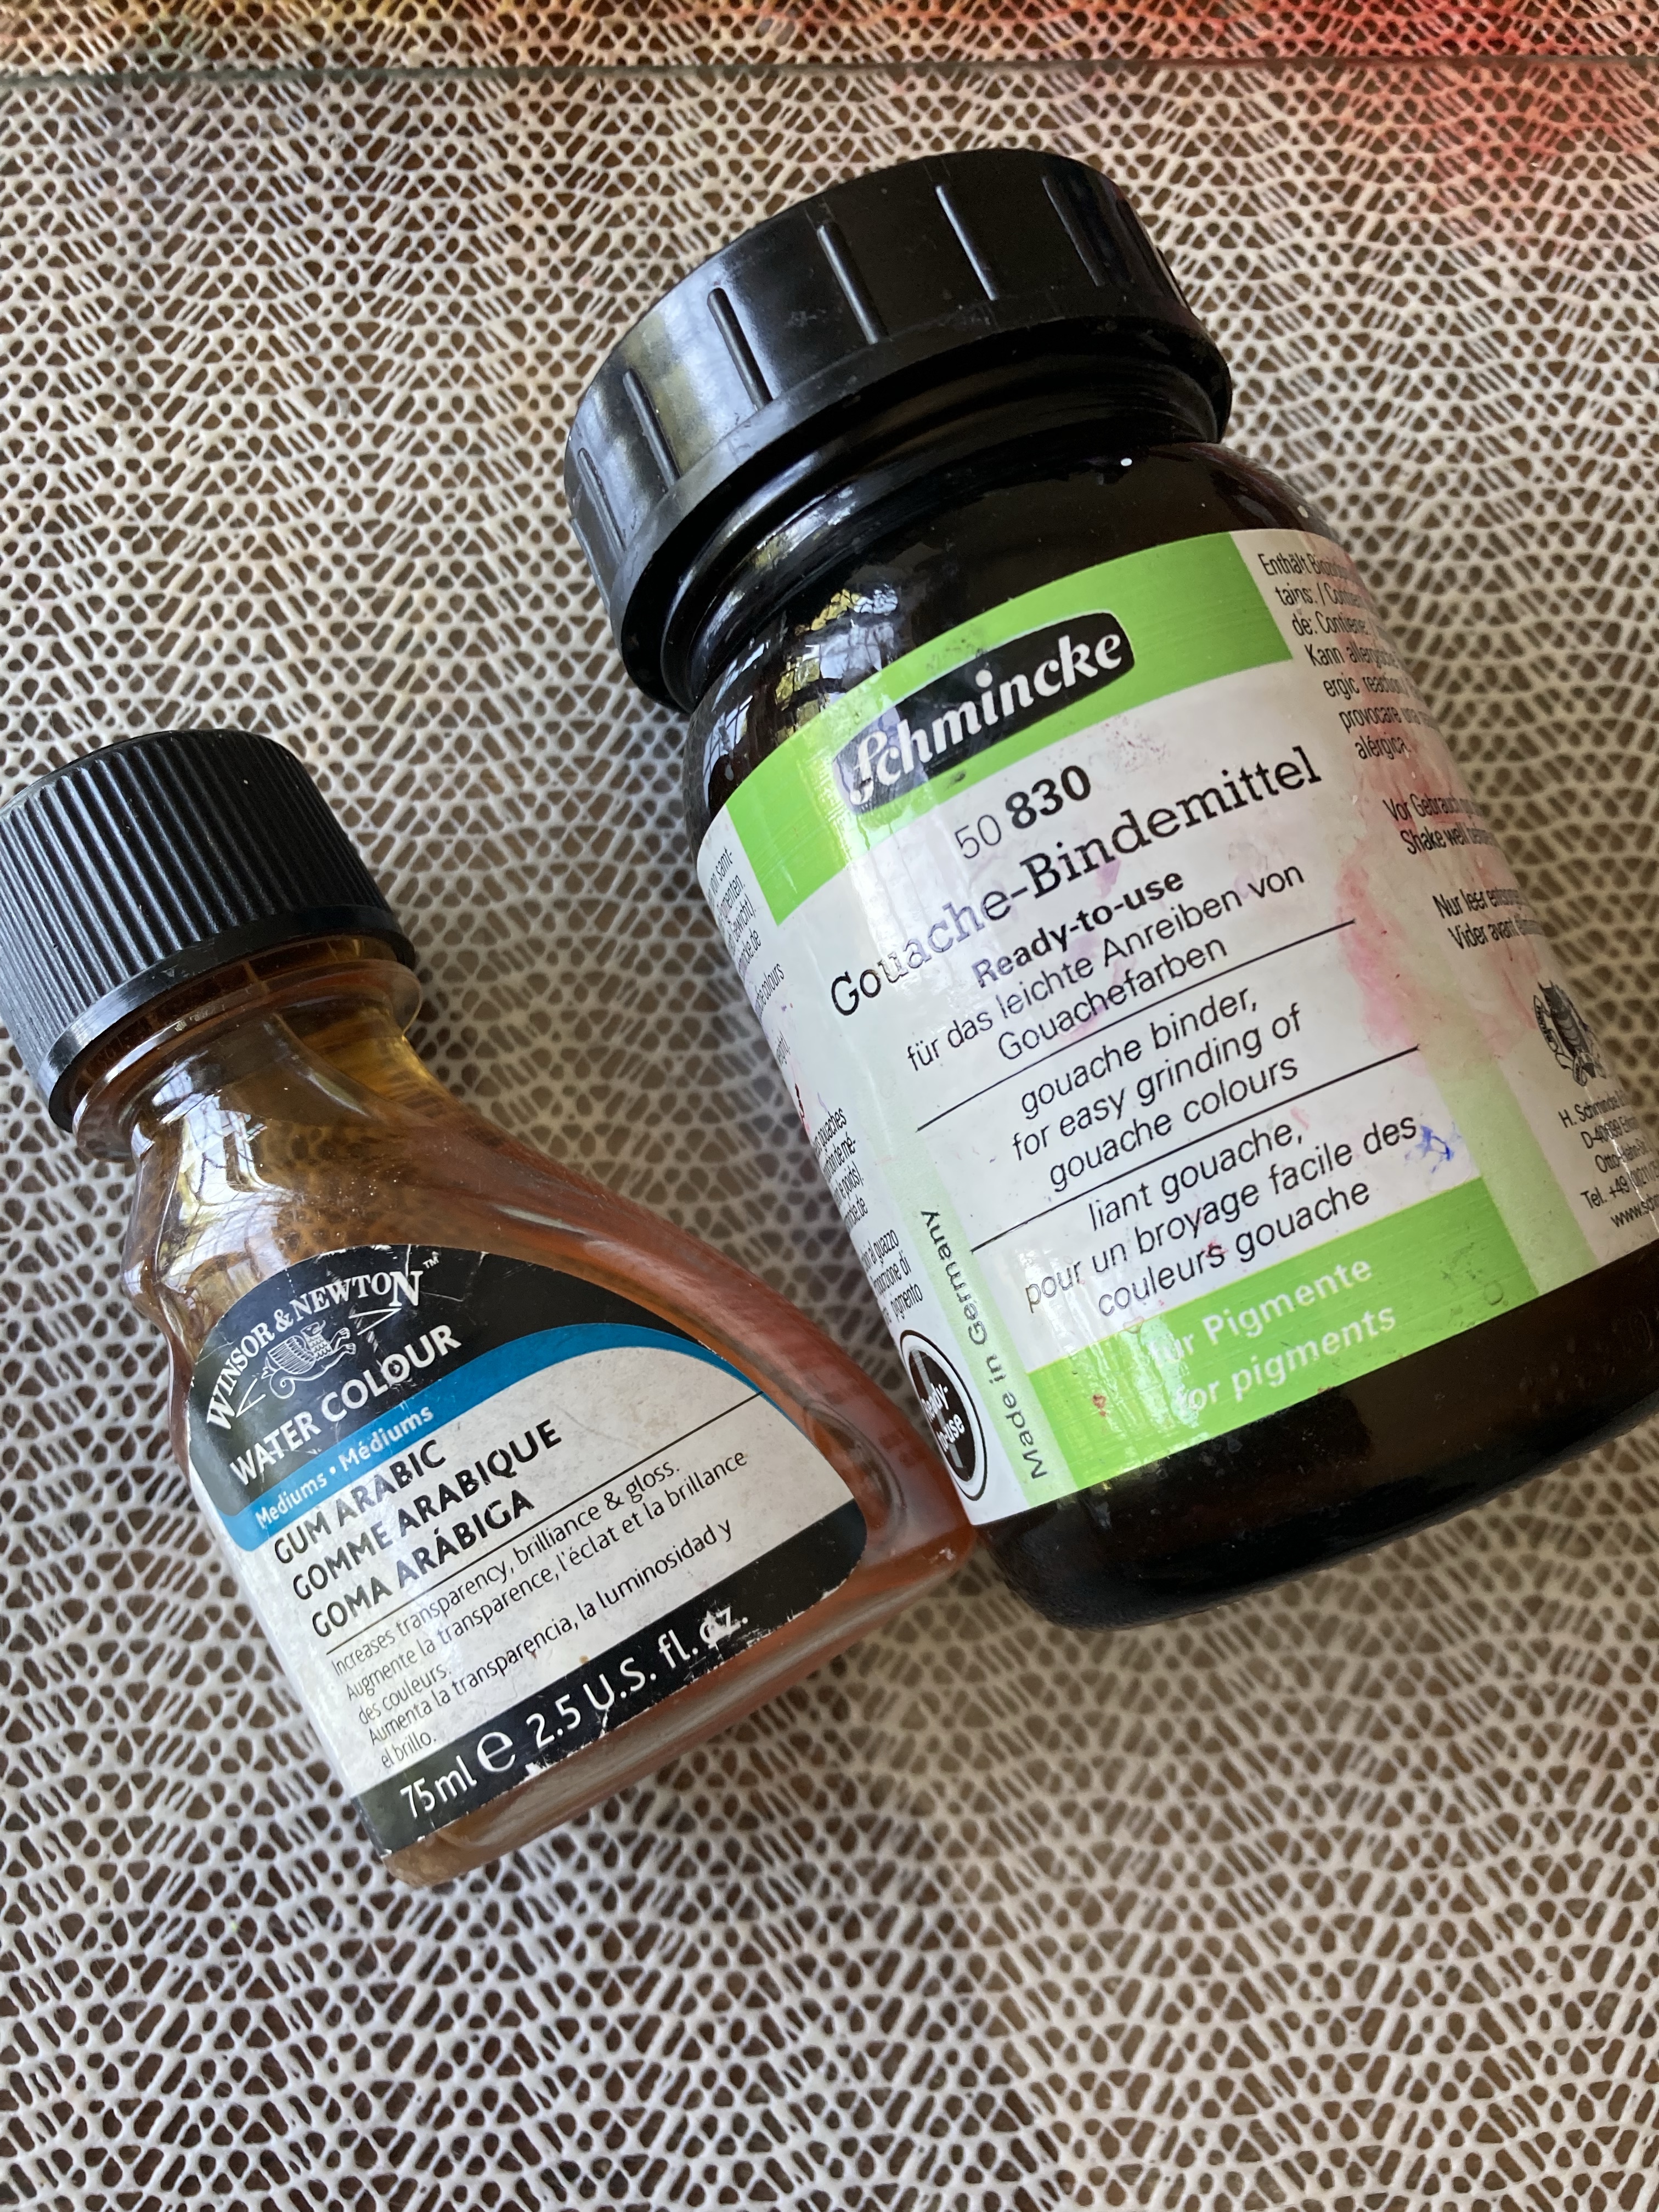
Binders. I’m a huge fan of Schmincke’s gouache binder, but there are recipes out there that use gum arabic and honey, but the Schmincke binder really does work fantastically and consistently. Also, it’s relatively inexpensive for the amount of binder that you get, especially when looking at how much gouache you are able to make. The downside is that the only people I’ve found who can keep it in stock are Blick, and even then, I still have to order it as my local store does not keep it in stock. Definitely call your local art stores to see if they keep it in stock.

Shells or (palette) wells. Either works, but you’ll need to store your paint in something. I like white ark shells, but literally any sort of cup-shaped shell will work. (don’t use anything that you couldn’t use as a scoop, as it will not hold your paint at all.) It’s taken me about five months to go through a 2 pound bag of shells, but if you’re doing paint for yourself, it’s okay to ask for shells from friends. Just make sure you clean them out really well to make sure all of the sand and other beach bits are out of the shell.
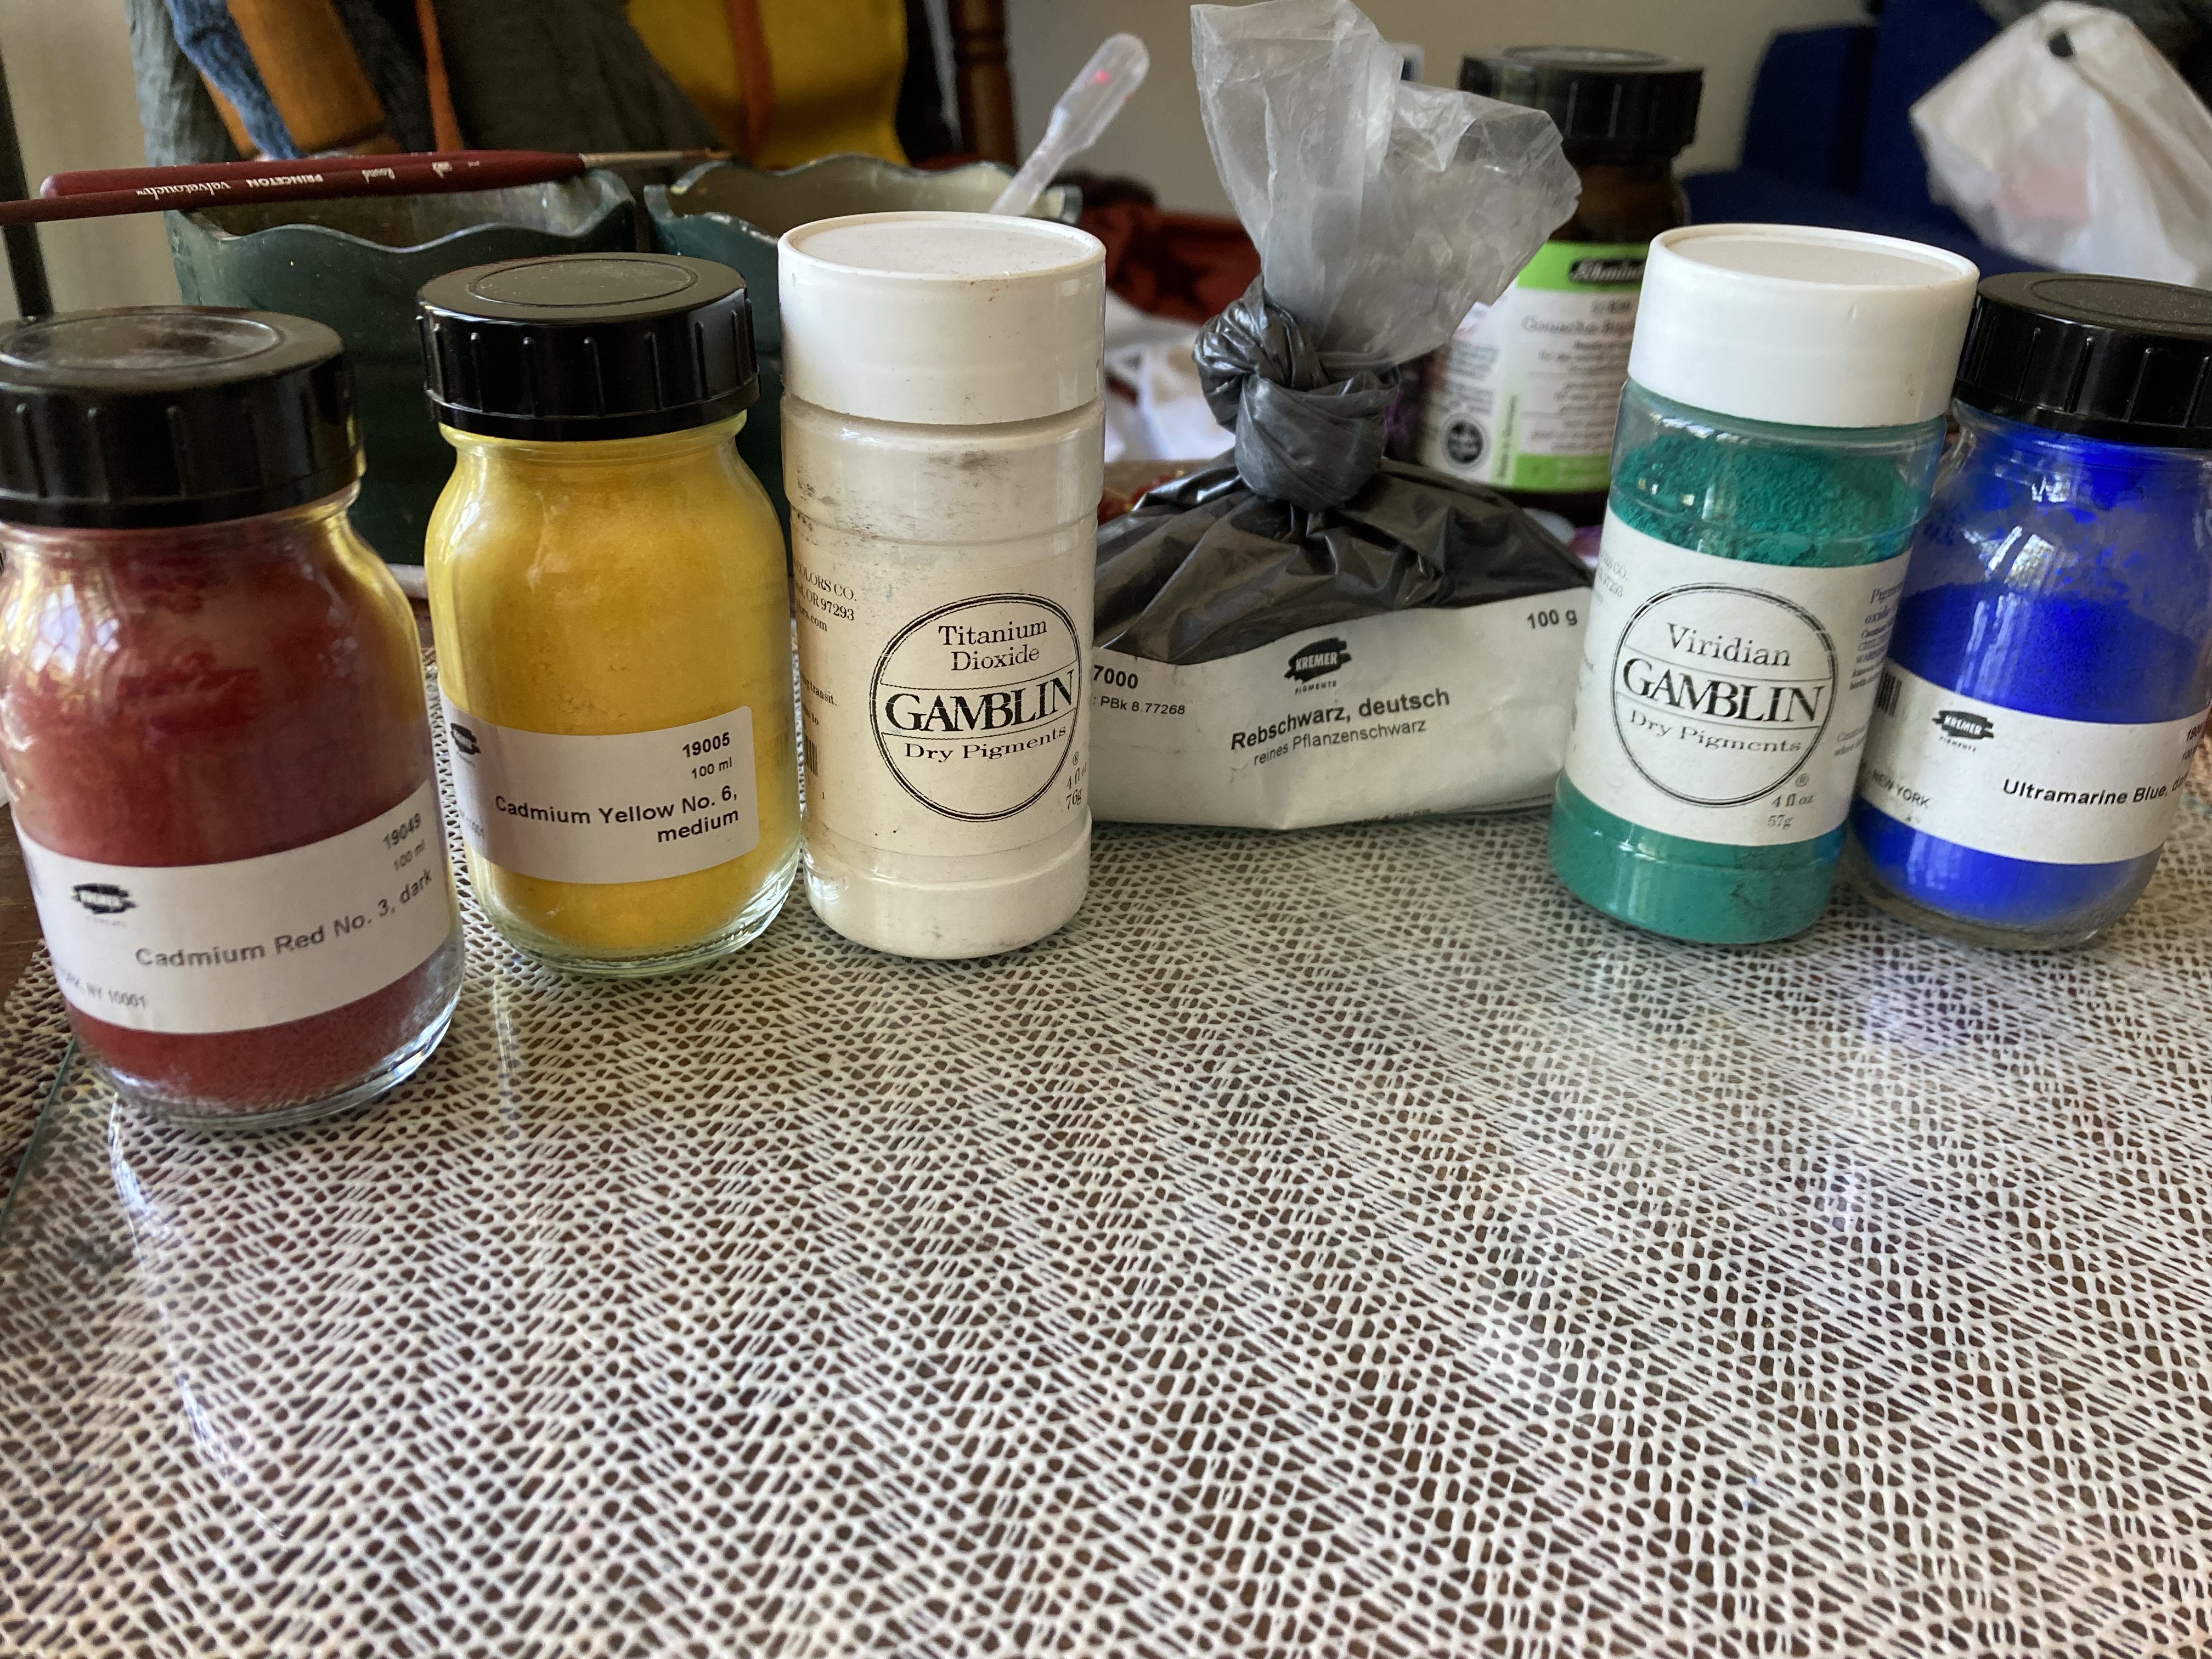
Pigments. Finally! The stuff that makes the paint work! I get most of my pigments from Kremer, but Natural Pigments, Gamblin, Sinopia, and Sennelier also work. Additionally, you can try making lake pigments from organic dyes, but if you’re starting out, it’s okay to purchase your own pigments. After all, people in period could go talk to a stationer for their pigments instead of crushing minerals into sizes that were fine enough to create paint with. (You are absolutely justified in also doing the period thing and purchasing your pigments from a supplier!) Of note, places like Kremer may ask for additional information and provide you with a material safety data sheet or MSDS, containing information about the pigments you have purchased, all done for the safety of you and the other beings that you might reside with. Keep this MSDS on hand in a folder or binder for quick reference in case of something bad happening.
Paper towels. I go through a lot of these, but it beats having to take a towel that I’m going to ruin and then throw into a shared laundry room where it could leave residual pigment. No, it’s not as green as it could be, but it works. Shop towels can be a bit overboard, but I like the ability of them to pick up the very last bits of pigment.
Optional: measuring spoons. I don’t use them, as I do a lot of measuring by feel and eye, but these can be helpful if you’re making very exact recipes. Do not use these measuring spoons for anything else, especially food. Again, while a lot of modern pigments can be marked as non-toxic, it’s still generally not a good idea to use these spoons for things that you’ll eventually put in your body.
Optional: Press-n-Seal. I use this a lot when packaging my shells up for largesse. I can write on the plastic to label the paints, and the Press-n-Seal is easier to work with than Saran Wrap, as well as being reusable. It’s also easy to find.
Now that you have a fairly full list of the supplies you need, this is the process I use when I make paint.
Step 1: Put on your safety equipment. I’m not joking. Put your mask and gloves on.
Step 2: Assemble your work station. Make sure everything is close by – this can be an exceedingly messy task. Shut any animals or children out the room, make sure you have adequate ventilation, and make sure that you can work safely. Make sure your table surface is good and stable, too. You will be moving glass against glass.
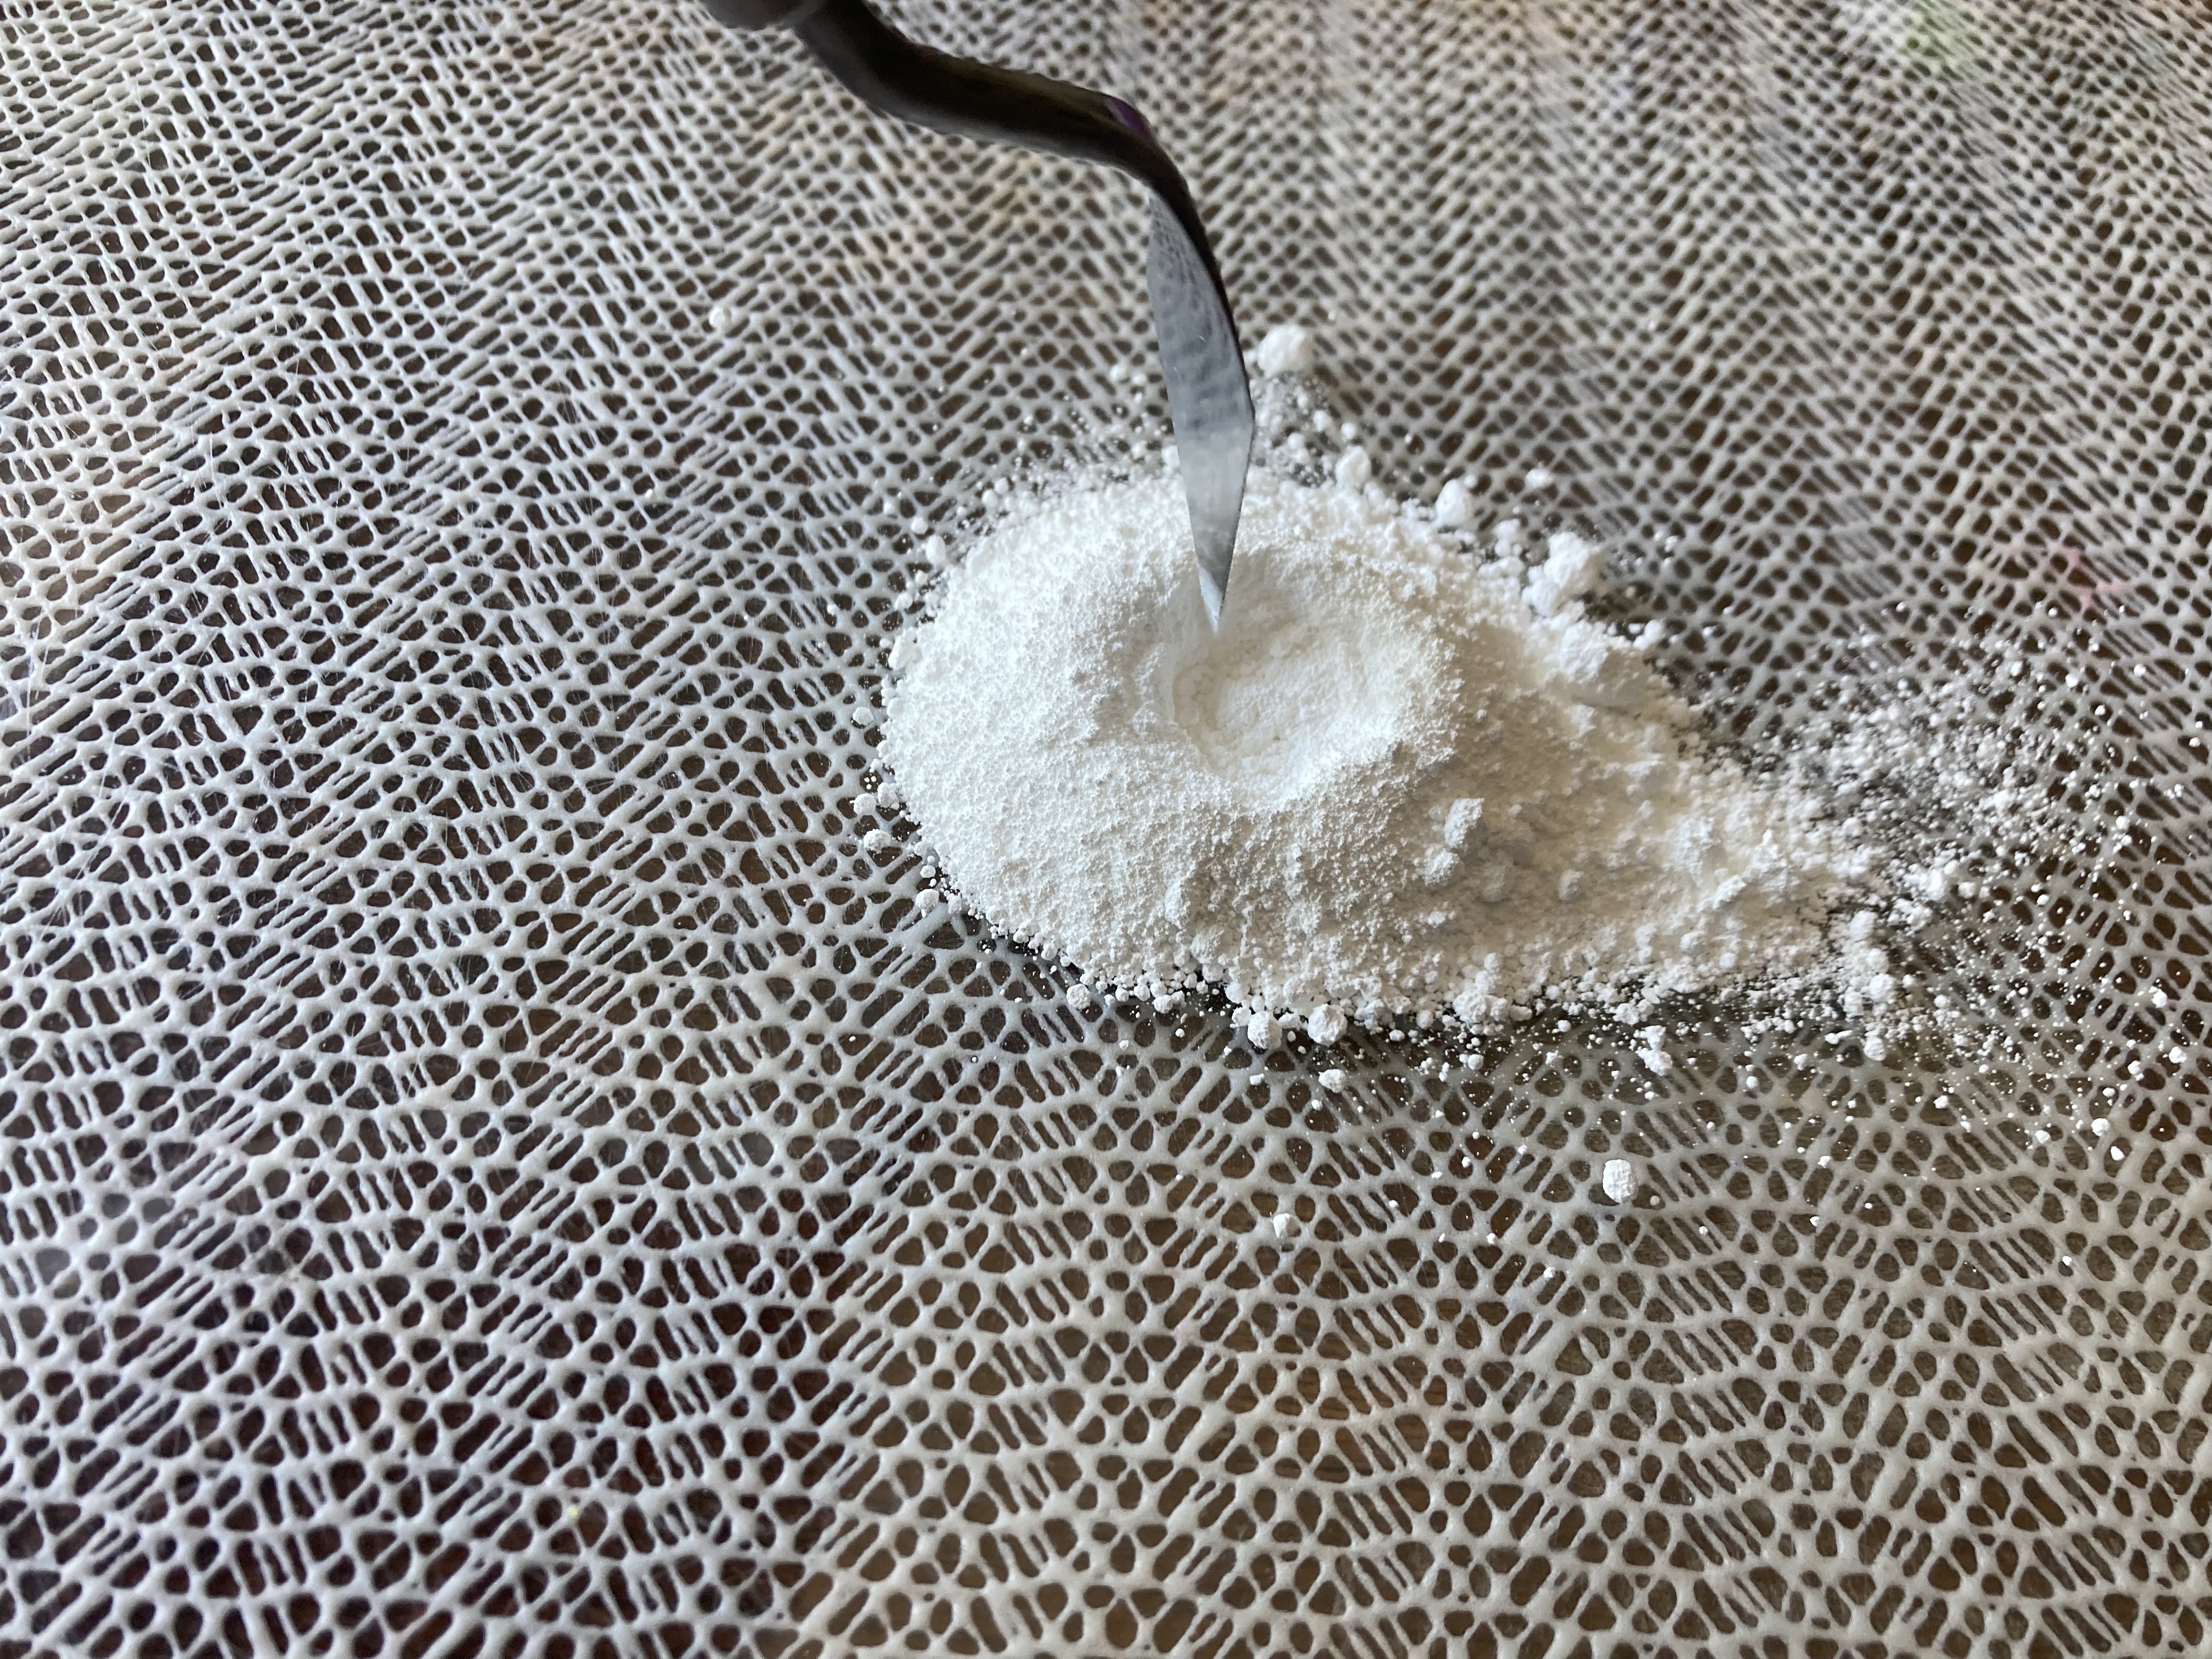
Step 3: put a little bit of pigment on your slab, making a small divot in the pile of pigment. I called this step “making forbidden pasta,” because it very much looks like making the flour volcano in the dough-making process. This little divot will help contain some of the binder, though just kind of be prepared that that it can and often will kind of spill out. It’s okay, as all of the pigment will eventually need to be incorporated into the binder.
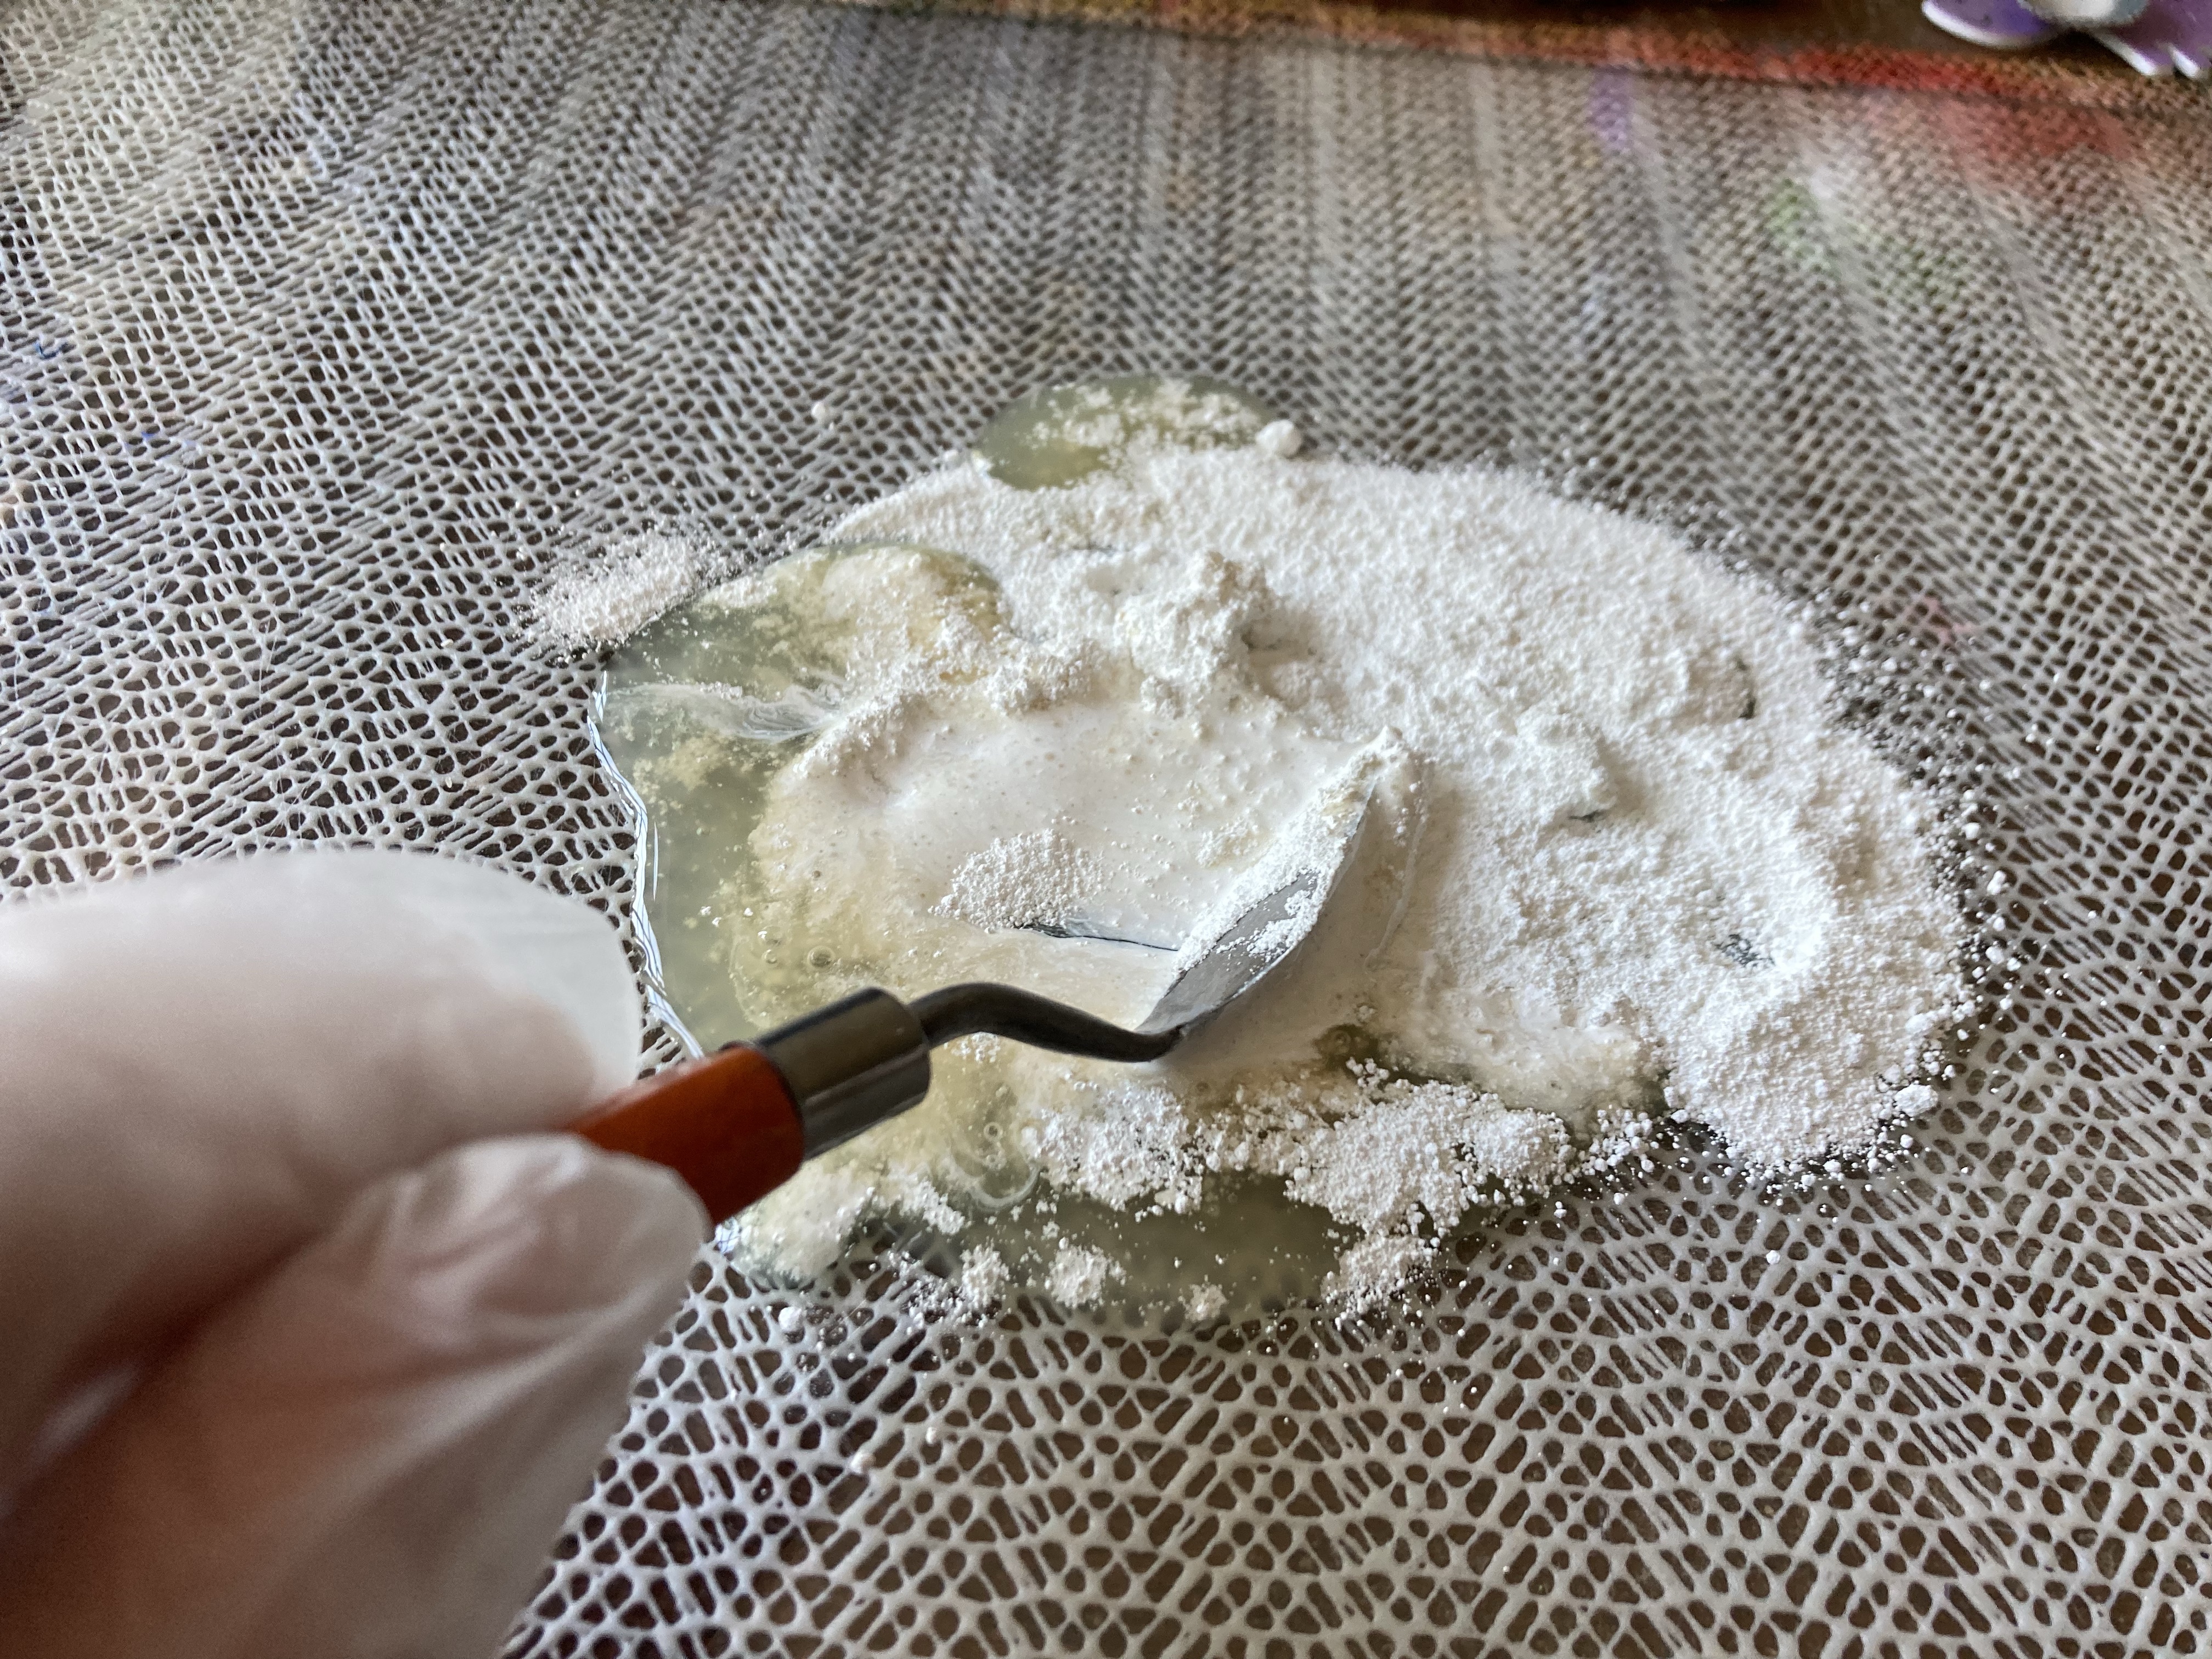
Step 4: put binder in the pigment, mix with palette knife. You’ll want to make sure to get the pigment mixed in with your more flexible of your palette knives, and you’ll want the texture of the mixed paint to be like that of a paste. At this point, you may want to add a bit more binder so that it’s a bit runnier, but play this by ear. Some minerals, like ultramarine, don’t need a lot of extra binder. Some pigments, like vine black, need a lot of pigment and not as much binder, so you might need to play the mix by ear until you get a good ratio.
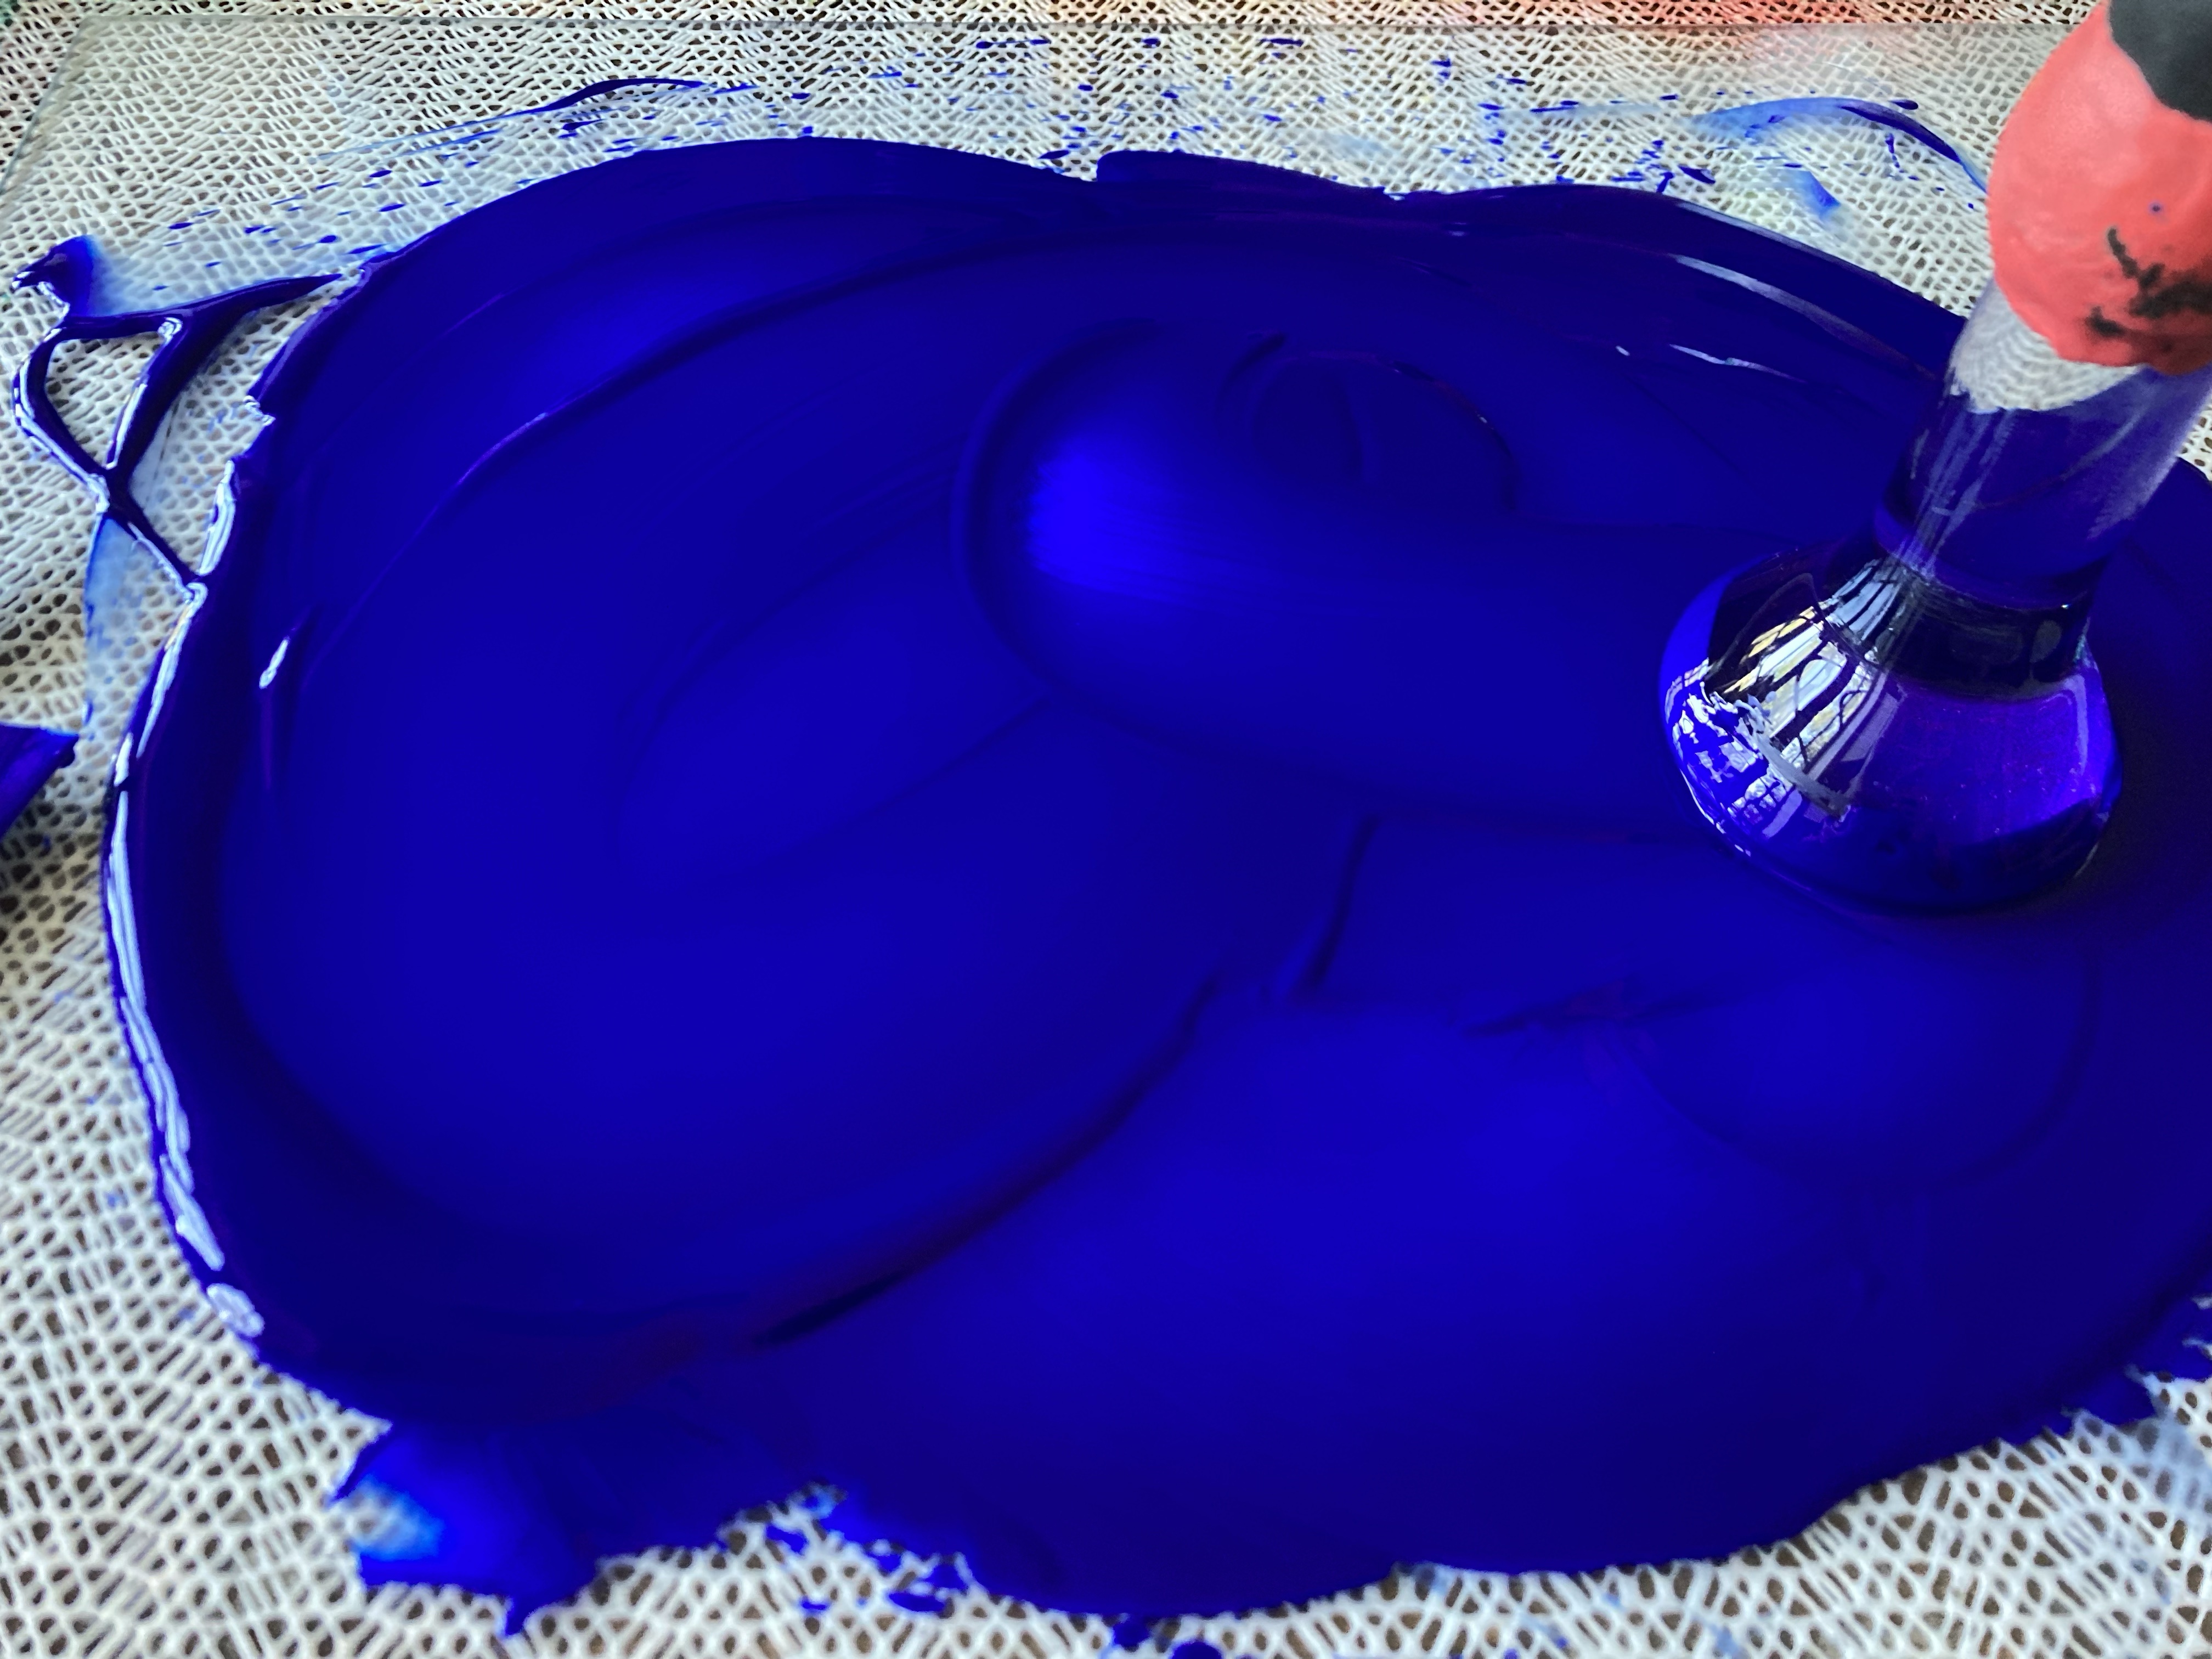
Step 5: Mull across the slab with the muller. Once everything is nice and coated with the binder, scrape your knives and get your muller. You don’t really want to use a grinding motion, but rather a gliding figure-8 or circular motion. (you can kind of see in this video around the :30 mark – please ignore that I did not wear gloves!) I frequently will mull completely out to the edges of my slab, and then use the flat-edge knife to scrape everything back in the middle. I mix these until it looks like I’ve got an even distribution (so make sure there are no lumps of pigment or scratchy sounds from unmulled pigment). If you need to test, take a wet paintbrush and try out a tiny bit of your paint. If it’s not covering or you can see the particles, then it’s not mixed enough. Of note, some pigments, like azurite and malachite cannot be mulled or ground too much as they will eventually lose strength and go clear. It takes a lot to get to this point, but it is possible to over mull, especially with pigments like those two. Just mix enough until you’ve got a workable paint.
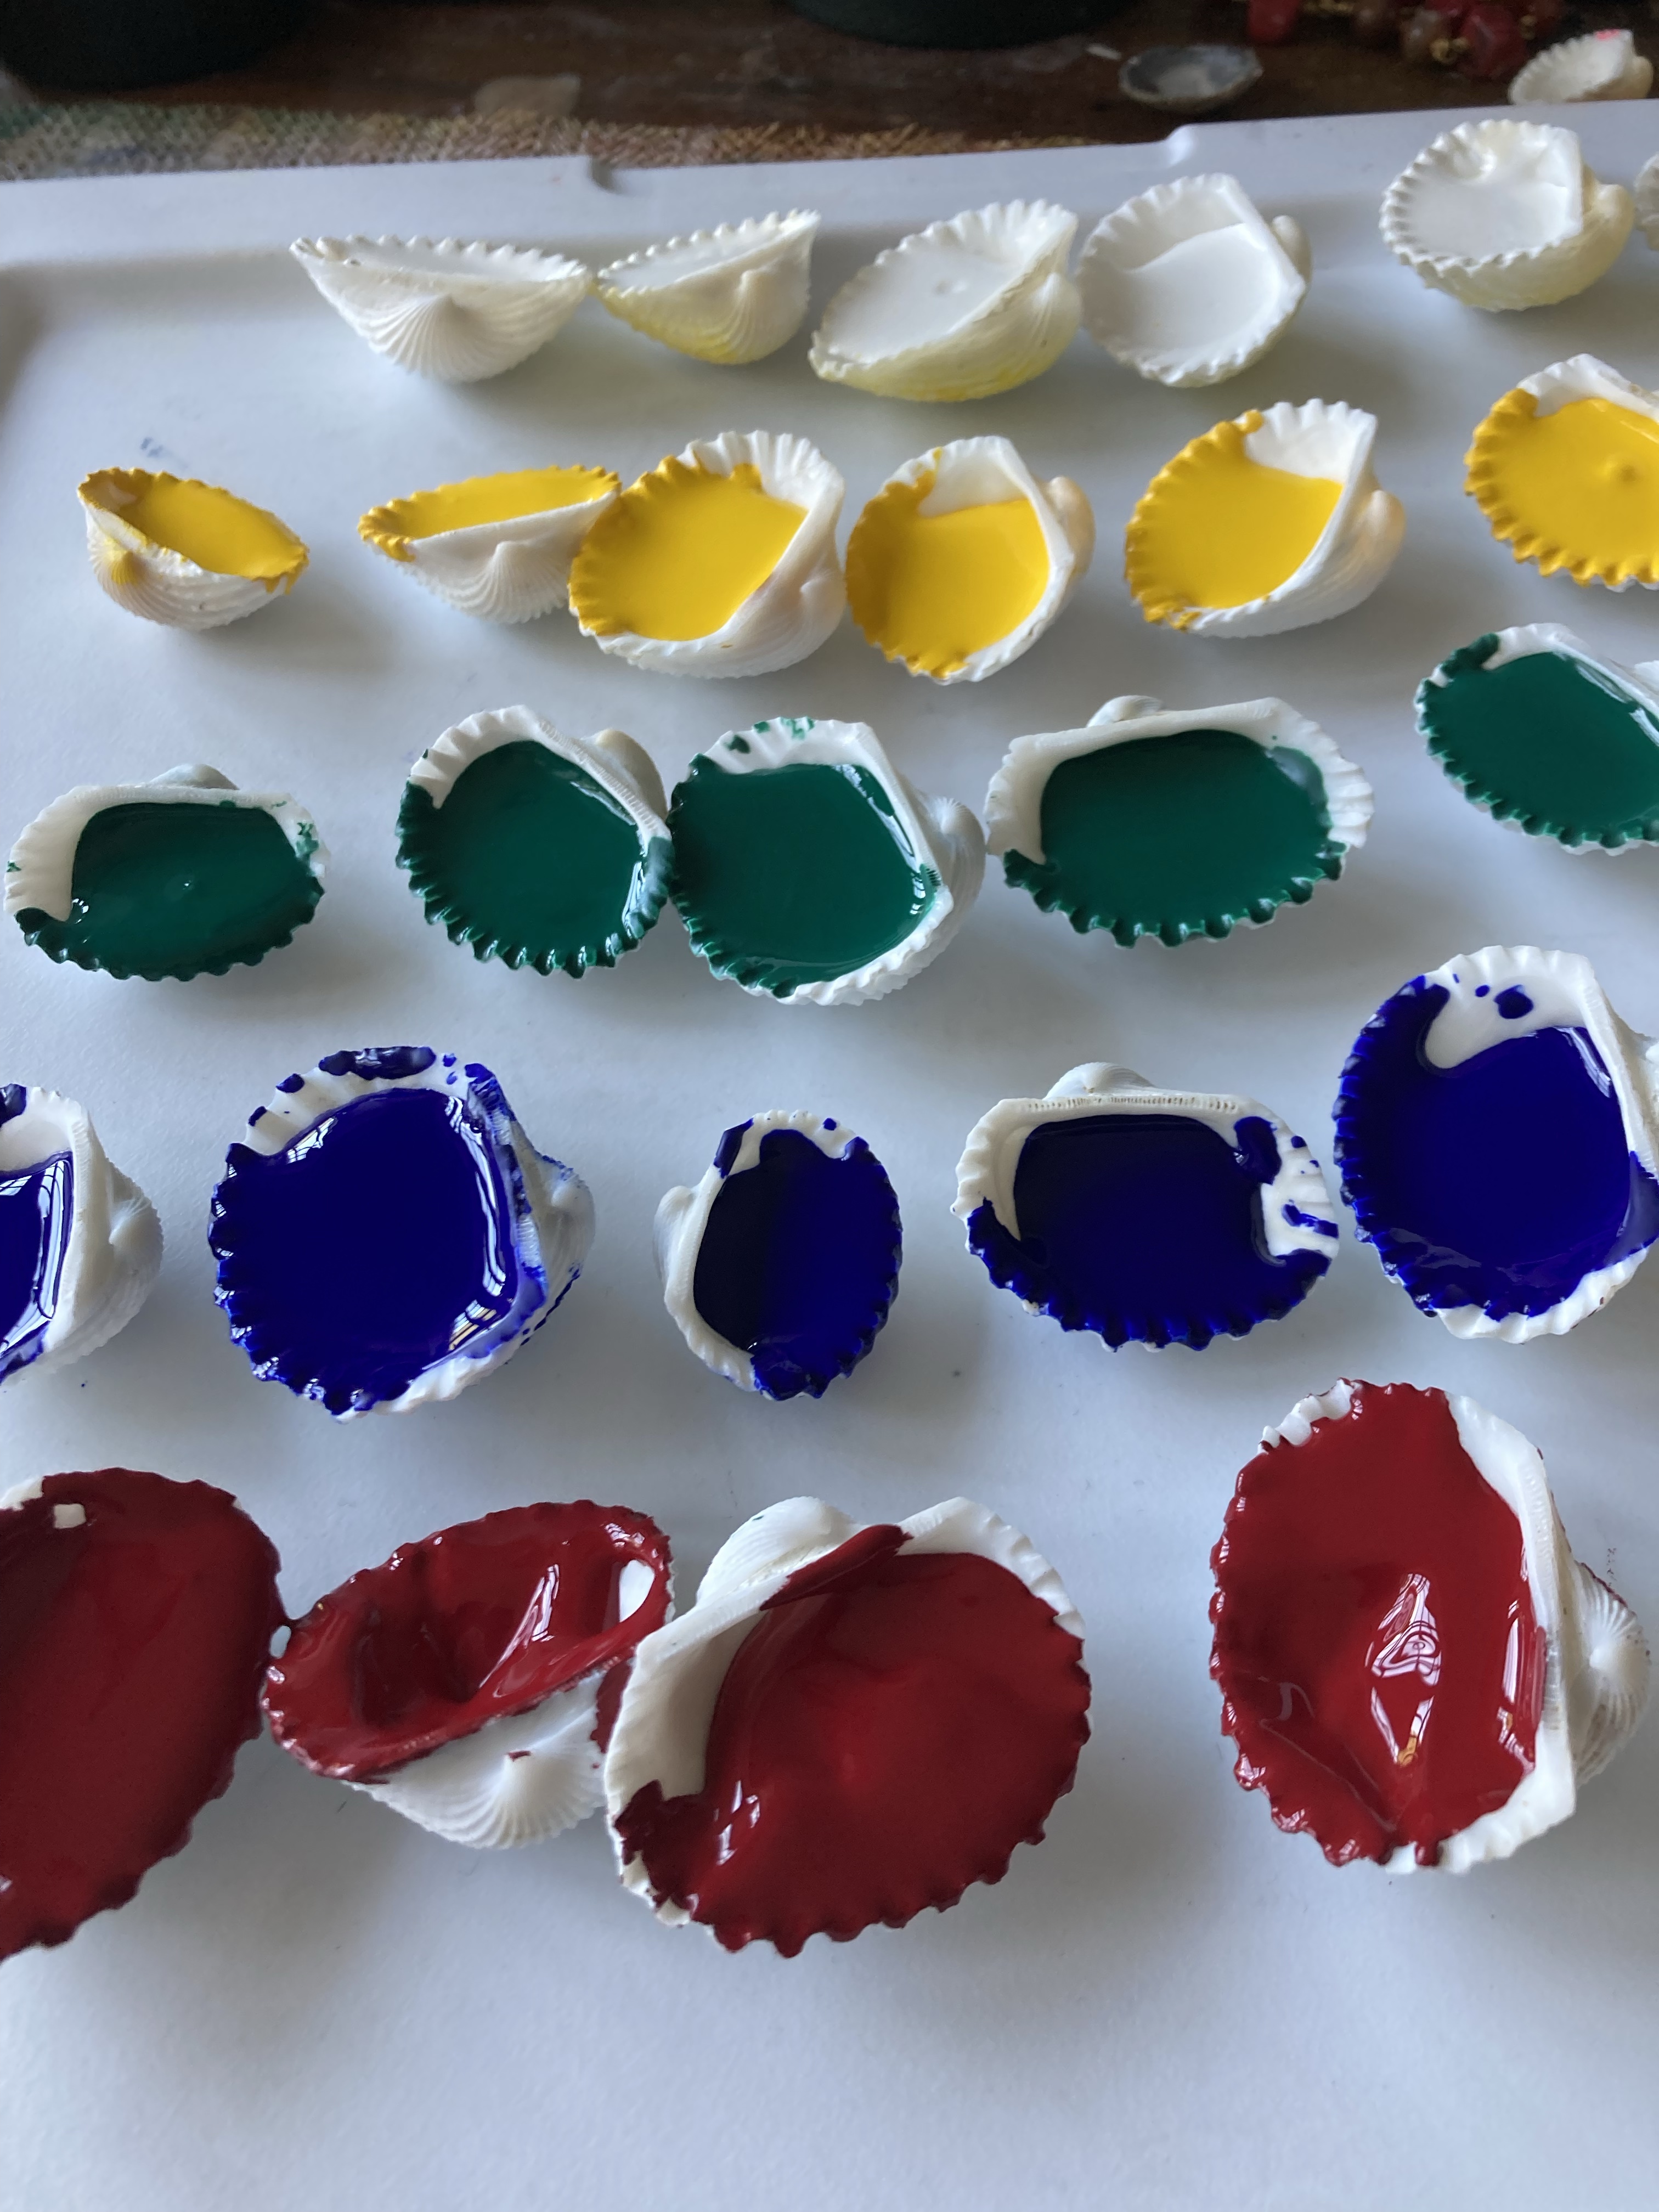
Step 6: scrape up the paint and package. This is probably one of the easier steps, but definitely make sure you keep your gloves on, as this part is extremely messy. I use the flat scraper to gather paint and then, especially if the paint is still runny, use this to drop into the shell or palette well. I then let these dry if I’m packaging them up for largess, or if I need to use them, I’ll add a bit of the wet paint to a palette with some water and work it into a creamy texture.
That’s it. That’s my process. That’s how I make paint, and I have to say, as someone who had a bad go of making it in college art classes, I really enjoy making it now. That said, if you’re going to make your own paints from pigments, or use handmade paints, it is crucial that you not lick or shape your paintbrushes in your mouth. (see also the Radium Girls.) While the pigments I use are fairly nontoxic, it’s still a bad habit to get into and can cause all sorts of health issues. (There is a very real reason I put “do not lick the scroll” and “do not lick your paintbrushes. I like you. I want to keep you around for a while. Licking the handmade paints does make it hard for you to stay around for a while.)
If you have questions, please feel free to reach out! I would love to see if you also would like to make your own paint.

Pingback: Interkingdom Shenani-plans | konstantia kaloethina
Pingback: Pigment Power: Transforming Powders into Paint